


Intro to the CAASie UI
CAASie lets you plan, build, and execute end-to-end digital out-of-home (dOOH) campaigns. You can see what boards are available on the platform, add them to a campaign of your choice, upload creatives, set and edit campaign dates, budgets, etc., collaborate with team members, and so much more. But let’s start with the basics!
Accessing the UI
There are a couple of ways to access the CAASie.co UI. The easiest way is to navigate to the website (https://caasie.co/), find the login button both in the header menu bar, and just below the title text.
Alternatively, you can visit https://ui.caasie.co/ and sign in from there. If you don’t have an account, https://ui.caasie.co/registration is your friend.
CAASie Structure
The general structure of CAASie works a bit like this: Organisations are the core entity within the platform. All users on CAASie exist within an organisation, similarly to a workspace on Slack and other collaborative apps. All of your activity on CAASie - e.g. your campaigns, the credits you purchase, the artworks you upload, will from now on be associated with your organisation.
If we think of organisations as the ‘parent’ entity that everything is associated with, you visualise everything else as a child to your organisation. Including yourself. You’re a child to your organisation.
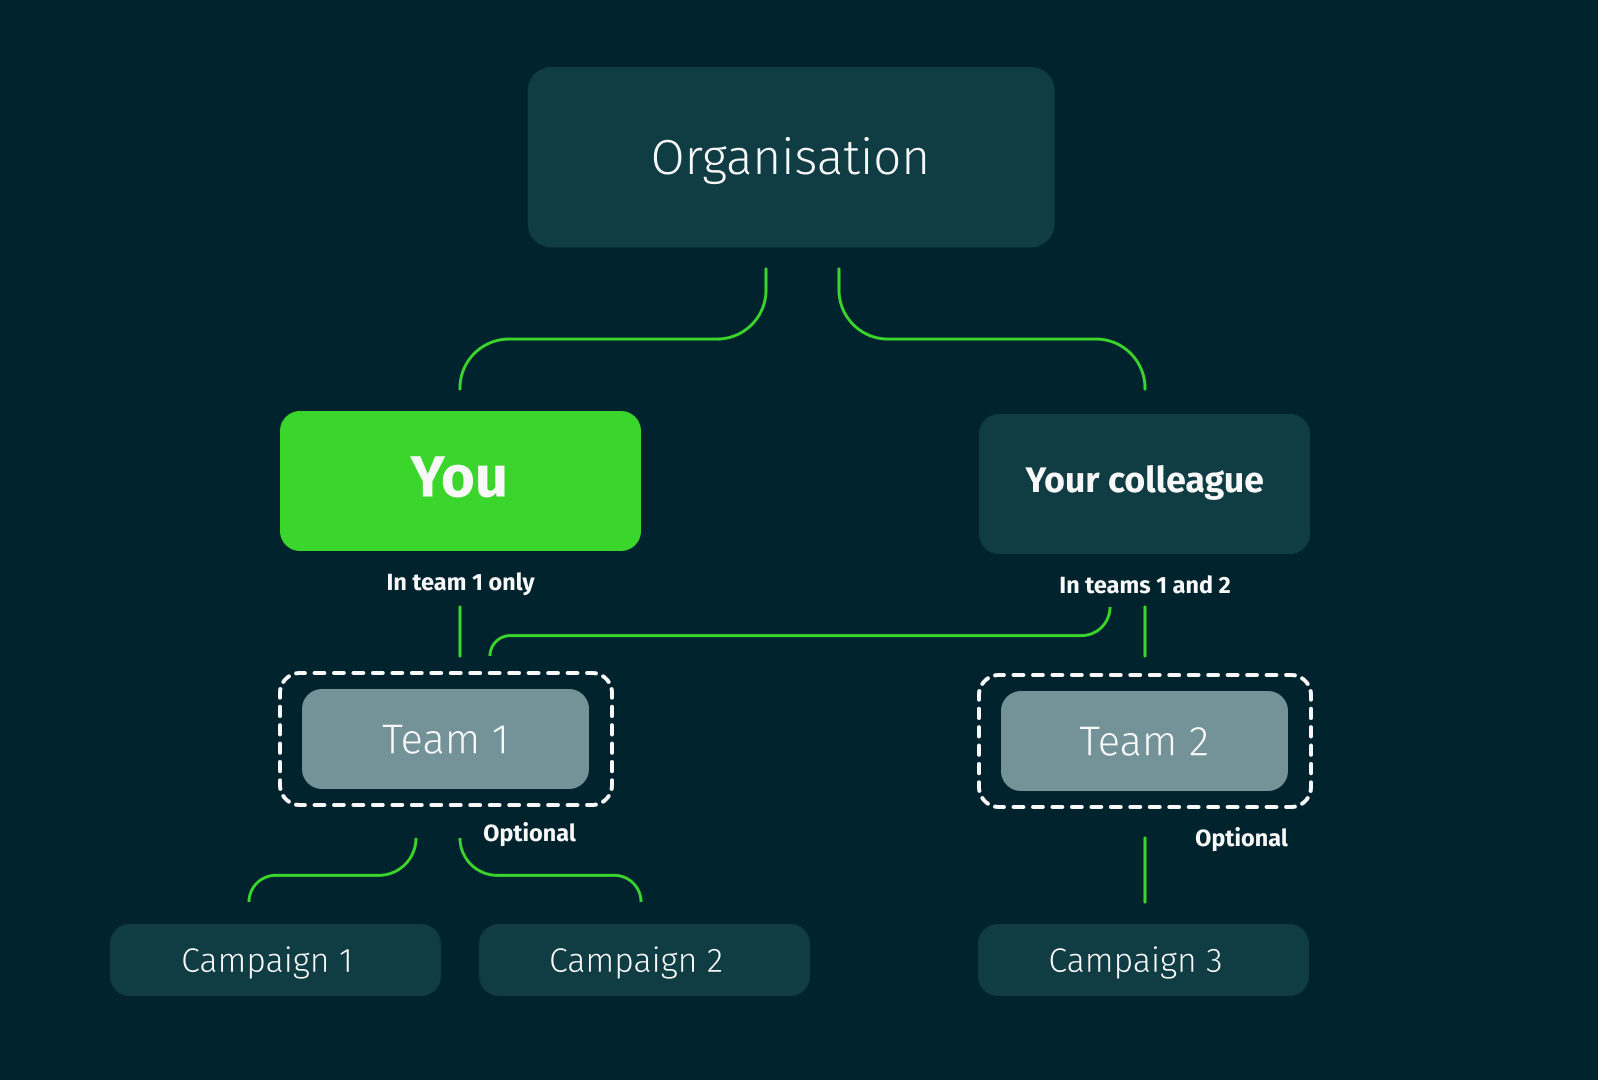
Organisations are parents to users, as before - and users can also be grouped into ‘Teams’. Teams aren’t necessarily helpful to everyone (you’ll need to activate this feature to use it), but you can think of them as user permission settings for campaigns. For example, a company might have branches in different states (or countries), for which they want the teams to act independently from each other, but still within the same global account.
Then you have campaigns, which of course is just a set of rules on how your ads will be served. Campaigns belong to an organisation and are managed by teams (or by all users if you’re not using teams). But before your campaigns can go live, you’ll need to have credit within your account.
So the workflow is as follows; You buy credits to add to your organisation. You then create campaigns within your organisation. These campaigns deduct credits against your organisation’s credit store or ‘cache’ as and when your ads are served.
A Note for Agencies
If you’re an agency account holder, you get a few extra goodies. Mostly to do with handling clients.
As an agency, you’ll still create an organisation for yourself when you sign up, however, you’ll also need to create client sub-organisations within your agency. This means that when you’re creating a campaign, you’ll assign it to a specific client. As these campaigns run, they’ll deduct credit from the corresponding client’s cache, rather than a global agency cache. You’ll still be able to see how much credit your account holds in aggregate, but it’s only accessible to campaigns via the client organisation/s.
Anatomy of the UI
The Side Navigation Bar
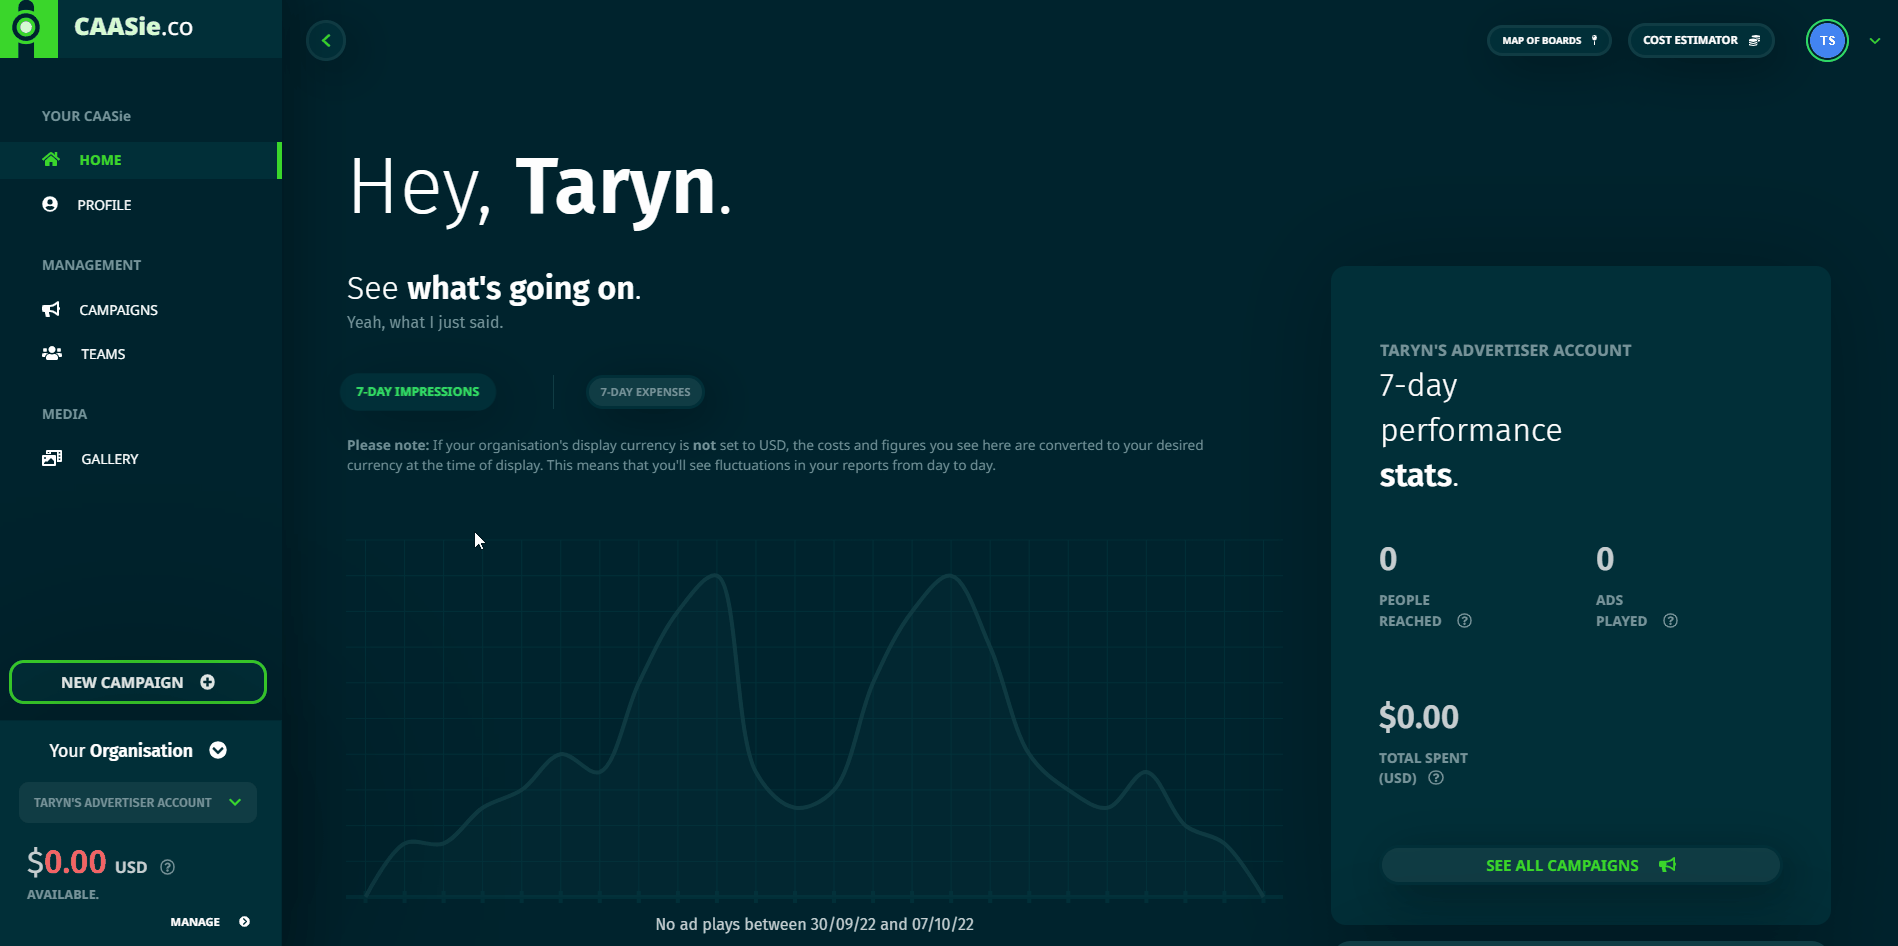
The left-hand navigation bar lets you quickly access all the pages within the app. The top ‘Your CAASie’ section, houses all the things about you as a user - the homepage which quickly shows recent activity across the account, and your profile and user settings.
Below that, you’ll find the management section, consisting of your Campaigns, Teams (if activated), and Clients (if you have an agency account).
Next up is the Gallery, which lets you access all the artworks/creatives that have been loaded into your organisation.
At the very bottom is where you manage all the organisation settings, including loading credit into your account and inviting team members to join the organisation.

The Tool Bar
The navigation bar across the top of your page has a few handy tools as well.

From left to right:
- The chevron toggle lets you collapse the navigation bar.
- “Map of boards” takes you directly to our map so that you can explore areas without having to create a campaign draft.
- “Cost estimator” is a basic calculator that allows you to do some very rough maths around what you can expect to budget for a set number of venues (note this only applies to Australia).
- Finally, you’ll see an avatar of yourself, here you can access your profile/user settings or log out.
Pages
When we talk about pages on CAASie, it’s usually referring to distinct sections within the app. If you click on any of the links in the navigation bar, you'll open up the corresponding page. E.g. by clicking on “campaigns”, you’ll navigate to the “campaign page” - where you will see a list of all your campaigns and drafts. Some pages also have tabs, which toggle to different content within the same page/s.
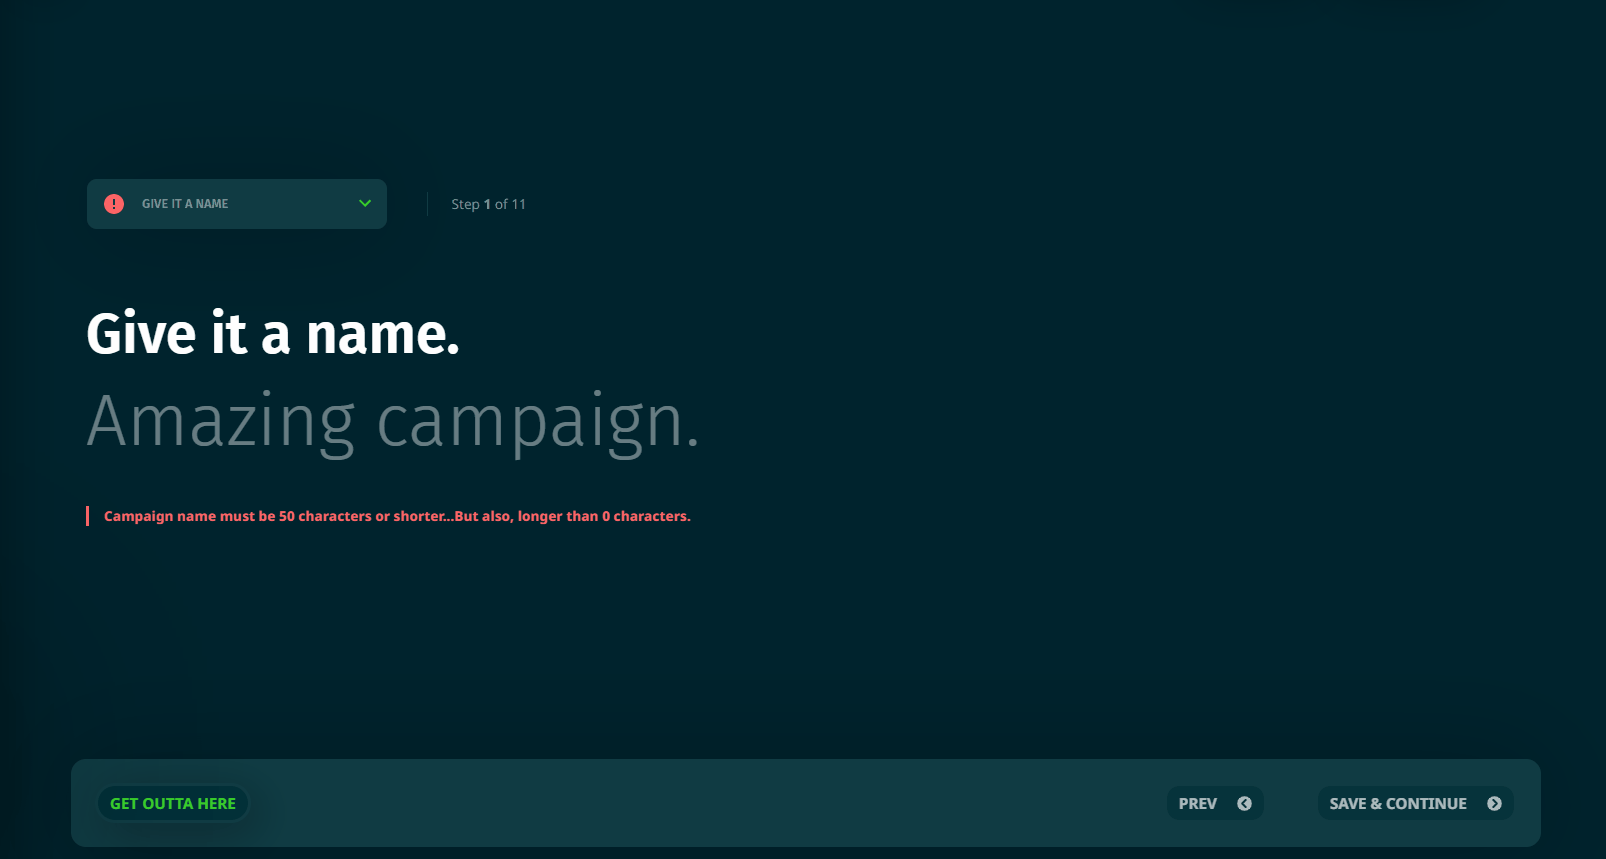
Campaign wizard
We skimmed past it earlier, but there’s a “new campaign” button on your navigation bar as well. Obviously this is a shortcut to creating a new campaign. Whenever you create a new campaign, you’ll open the campaign wizard which is where you can set up the rules for a campaign. Don’t forget to save your drafts if you exit mid-build!
Campaign dashboard
Once you’ve finished building your campaign, you’ll be able to access the “campaign dashboard”. This is where you can monitor and tweak/optimise your campaign. Each tab within the dashboard houses different information, but we’ll get into that in another article.
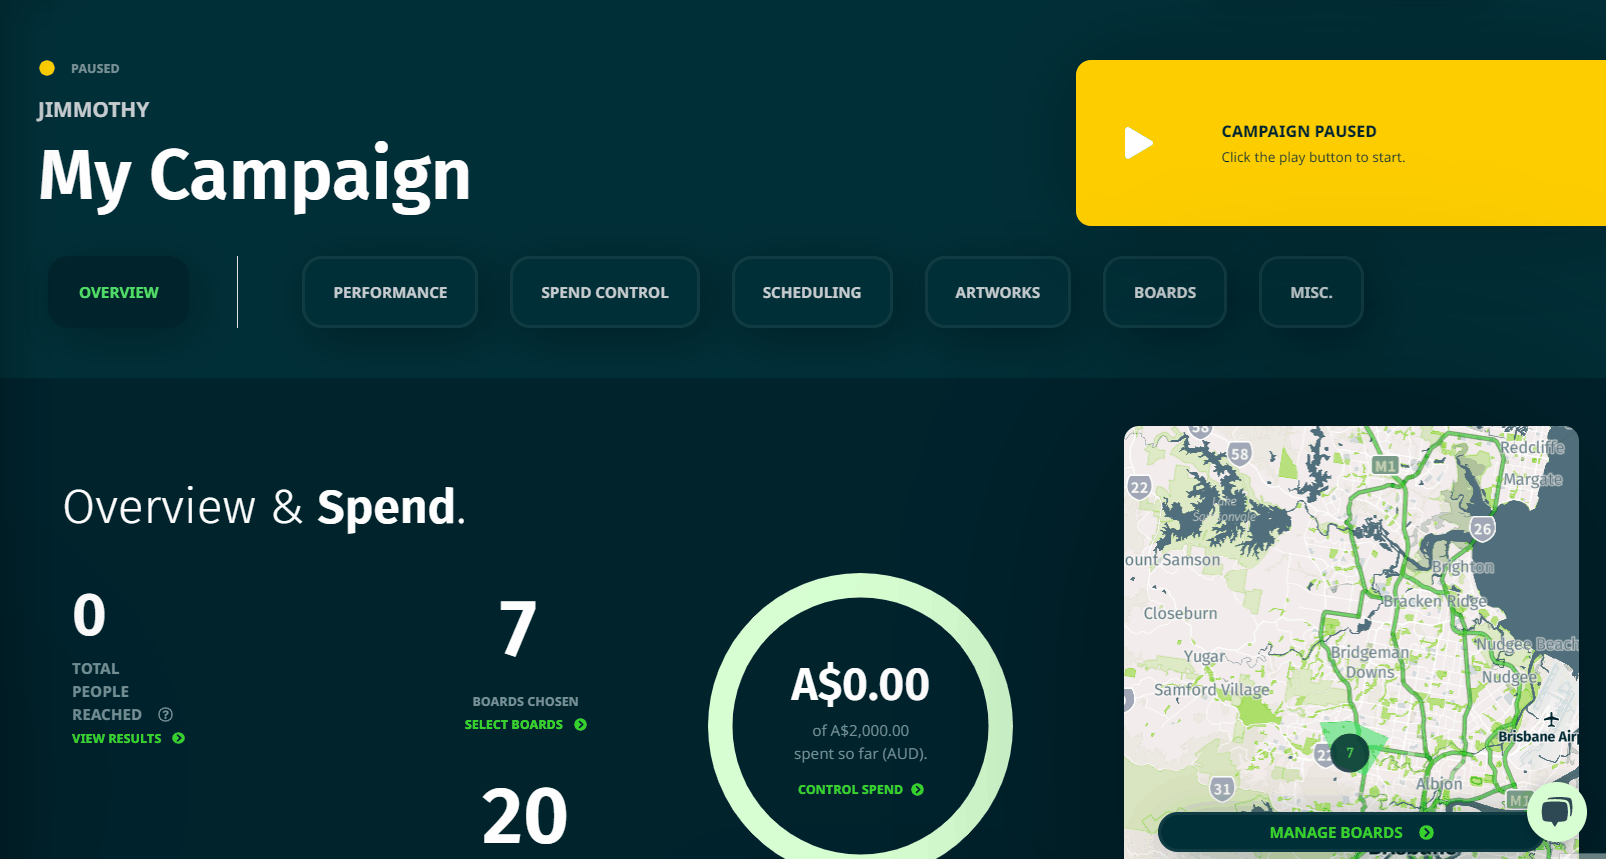
Colour Coding
Beyond just looking pretty, there is a functional colour scheme that is applied throughout the CAASie platform. Most notably is our use of the traffic light system. If you see bright colours, they always mean something. Green is good or go, yellow is a warning and red is an error or possibly an issue for your campaign.


