


Here's a quick explainer of the campaign editing process and what each of the various buttons, knobs, sliders, and thingamabobs in your campaign dashboard do.
To make life easy, we’ll walk through the entire campaign dashboard, and talk about what each of the main tabs show you, and where you can find the controls to manage your campaign’s different parameters.
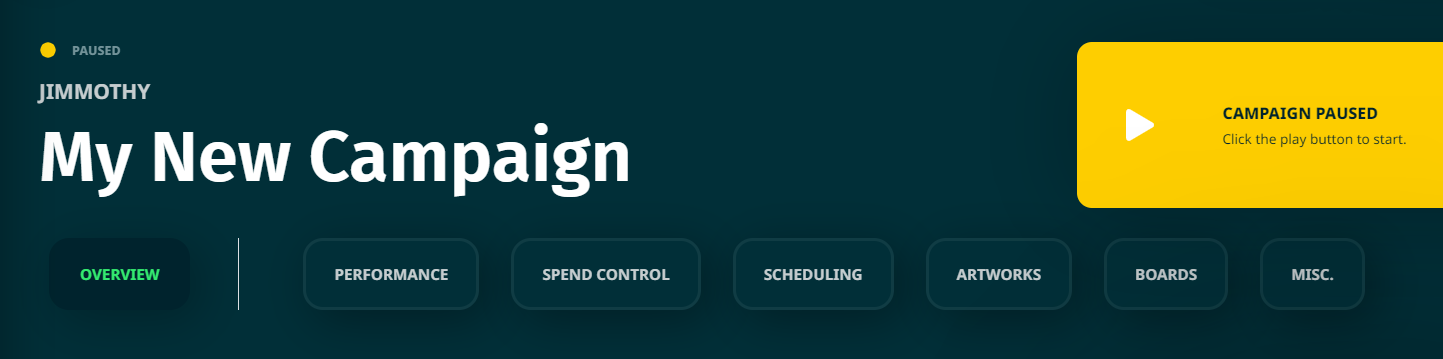
When you first drop into your campaign dashboard, you’ll see a few buttons along the top row. These are categorised by the controls that you have (to tweak) with your campaign. Take a look at these below.
Manage your Budget & Pacing (Spend Control)
Budget and pacing is a deceptively simple topic. Most CAASie users take a number of campaigns before they get a full handle on this, but we’ll do our best to explain what it means quickly. At the bottom of this section, you’ll get a link to advanced budgeting concepts (a deep dive, so to speak). So we’ll keep this article brief.
Budget and pacing are essentially two sides of the same coin. Budget is, for lack of a better word, a cap on what your campaign is allowed to spend. Pacing on the other hand determines how quickly your campaign is allowed to spend that budget.
Anyway - when you’re in the Budget & Pacing section of your campaign editor, you’ll be greeted with the following view:

Spend Limit (total budget)
The first thing on that page is a prompt to enter (or technically edit) your spend limit. This is the total amount of credit your campaign is allowed to expend. Please note at this point that this can be ANY value. It can be higher or lower than the amount of credit you have left in your organisation. If it’s higher - your campaign will run until the credit available has been exhausted.
Spend Pacing
Spend pacing gives you 3 options. You can leave this on automatic (auto), which lets CAASie dynamically calculate how much money to spend per hour to ensure your spend limit (that you’ve set above) will be evenly spread across the entire campaign duration. The other two options are ‘hourly pace’ and ‘daily pace’. As you can imagine, these let you set a custom pace for the CAASie algorithm to serve ads while trying her best to match your target rate.
As a quick note - the hourly pace is recommended if you must control the pace yourself. The daily option is available as an alternative, but it does not try and maintain even spend through the day and may result in spikes of ads served throughout the day, particularly during times when ad costs are lower (generally times of lower reach).
Bid Strategy
You might have guessed by now that CAASie is an ad auction system. At its core, CAASie is designed to take your ad and deliver it to the boards of your choosing. But there arises a situation where multiple advertisers are vying for the same board at the same time. The CAASie auction is designed to resolve this situation. There’s a deep dive article which we’ll link below, but suffice to say that the cost of a board is not just driven by the audience the board will reach, but also its popularity on the platform.
This is where your bid strategy comes in. It’s a bit of a misnomer in the sense that there’s no real “strategy” you can put forward per se. All you’re doing is saying whether CAASie can automatically scale your bid up and down as needed, or whether you cap it. This takes the form of the ‘max CPP’ or maximum cost-per-play you’re willing to part with for the sake of this campaign.
Here’s where you choose!

We recommend leaving this on automatic at least until you’ve got a few plays in your campaign. Once you establish the average cost per play (via the performance section), you can then decide whether you want to cap the cost-per-play across your entire campaign.
Deep dive into budgeting, pacing, and bids
Manage Dates & Schedule
The Dates & Schedule tab has a relatively obvious function. You can manage the start and end dates, along with the schedule of your campaign here.
On the note of obvious things - You can change the dates at any time under the date tab, and similarly with the schedule in the schedule tab.
What’s the difference, you might ask?
The difference is that the start and end dates of your campaign define the overall flight time of your campaign. In other words, they’re fixed boundaries. Your campaign won’t start till the start date, and won’t run beyond the end date.
Scheduling, on the other hand, is more about the times you want your campaign to run. So, for example, 4-5 PM on Tuesdays. This gives you control over times you want your ads to show and, more importantly, times you don’t want your ads to show.
To wrap that up, visualise dates as saying you want to run your campaign between the 4th and 12th of October. Your schedule will ensure that your ads will only show if the day happens to be a Friday, and if the time is anywhere between 12PM and 1PM in the afternoon.
Read more about dates, schedules, and use cases here
Manage Ads & artwork
On this section, you’ll see a few things. Firstly, there’s a drag-and-drop section for uploading your artworks. Secondly, You’ll see a tile for every unique artwork required. While we’d recommend that you fill every tile with artworks, it’s entirely up to you to add as many of these as you like.
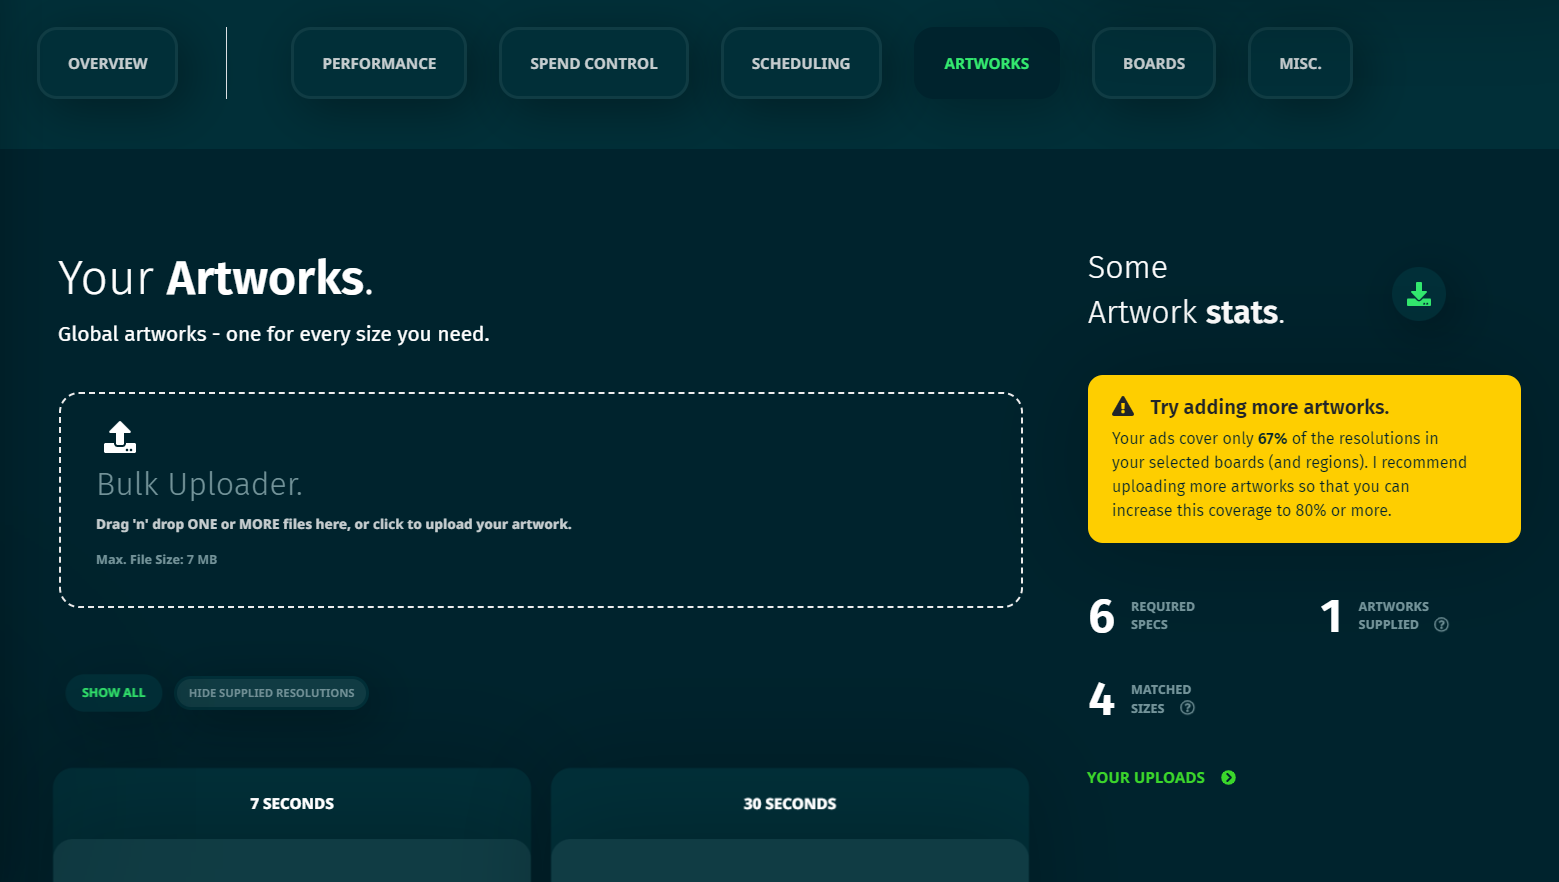
Each card represents a “resolution” or spec set that needs covering to ensure you have full coverage of the boards you’ve chosen for your campaign. You’ll also see a gauge of how many boards (in your campaign) will be covered, should you upload the relevant resolution to your campaign. We call this the “board coverage”, shown here:
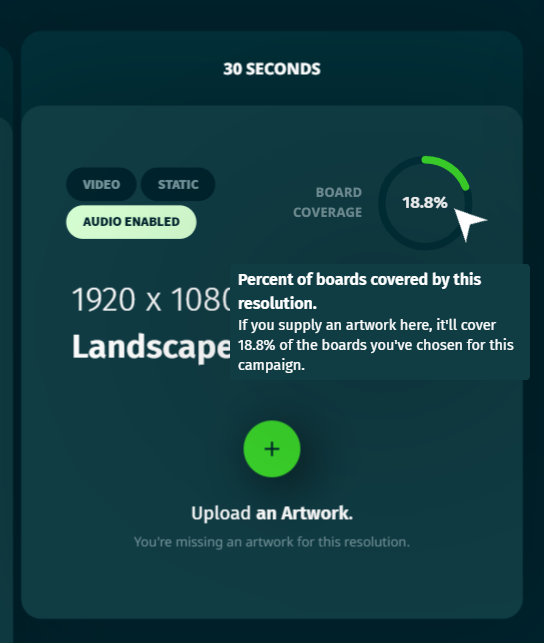
Pro tip: A good strategy might be to upload the artworks that cover the most boards first, then cover the boards with lower coverage values until they’re all covered.
The other thing worth noting is the approval status. CAASie has a 2-stage approval process whereby once an artwork is uploaded, it is firstly reviewed by the CAASie team, and then forwarded to the respective media owner for final approval. Here’s a quick guide on what each of the approval statuses mean:

Diving deep into artwork management and best practices are outside the scope of this article, so have a look at the links here if you want to read more about advanced ad management and
Manage your boards
At some point in your campaign, you might want to delete boards, swap out existing boards for new ones, or simply add more. This section essentially lets you do that. When on this tab, you’ll see a map of the boards you’ve chosen, along with a list of the individual sites, with a picture and some other details.
Remove Boards
To remove boards, all you have to do is click on them (to select them). You can select just one and remove it using the options that display under the card:
Alternatively, you can select multiple using SHIFT+ CLICK (on each board). In this case, the menu at the bottom of the cards does not appear, but you can scroll up to the top of the section and click the ‘Remove Selected’ option that now will appear just below the search bar.
Adding new boards
To add new boards here, you can click one of the two buttons above or below the map view to the right of your screen.

Once you do this, you’ll be taken to the map where you can modify your board selection. We won’t go into navigating the map in this article, but once you’ve added any new boards (or removed any old ones, which you can do via your cart), you can click the ‘Save & Close’ button to apply the changes to your campaign.
Pausing or Deleting
Pausing a campaign is relatively straightforward. In fact, there’s a big yellow bar at the top of your campaign dashboard! Toggling this will set your campaign to play (or stop playing, as the case may be).
Deleting, on the other hand is not quite as obvious, but is still possible to do. To delete a campaign from within the dashboard - go to the Miscellaneous (‘Misc’) tab. There, on the right hand side, you will find a button to delete your campaign. This is a permanent move, so please do consider pausing (or even archiving) a campaign instead.
Cloning or Archiving a Campaign
Cloning and Archiving are not exactly related, but we decided to give them their own category because neither can be done from within your campaign dashboard.
Cloning a campaign might be useful if you want to create a similar campaign as one you’ve already run, or if you just want to run multiple artwork variations. To clone a campaign, head on over to your campaigns tab (on the sidebar).
When you see the table, click the checkbox next to the campaign you want to clone, and head over to the quick actions button on the top-right of the campaign. There, you’ll be given the option to clone, delete, or archive your selection. Obviously, if you’re seeking to clone - click the clone button.
From there, you’ll be taken through the campaign setup wizard again - except this time, all the fields (with the exception of your artworks) will already have been set for you.
The process is similar with archiving a campaign, except that instead of clicking ‘clone’ above, you’d click archive. Voila!


