


Create a CAASie account
If you haven’t created an account, head on over to the home page, and click the sign-up button. This won’t take very long but it’s kind of important to do before moving onto the next steps.
See the account setup article here for more details on setting up the right account for you.
The new campaign wizard
The new campaign wizard (which can be accessed from the sidebar) is designed to walk you through setting up your campaign parameters.
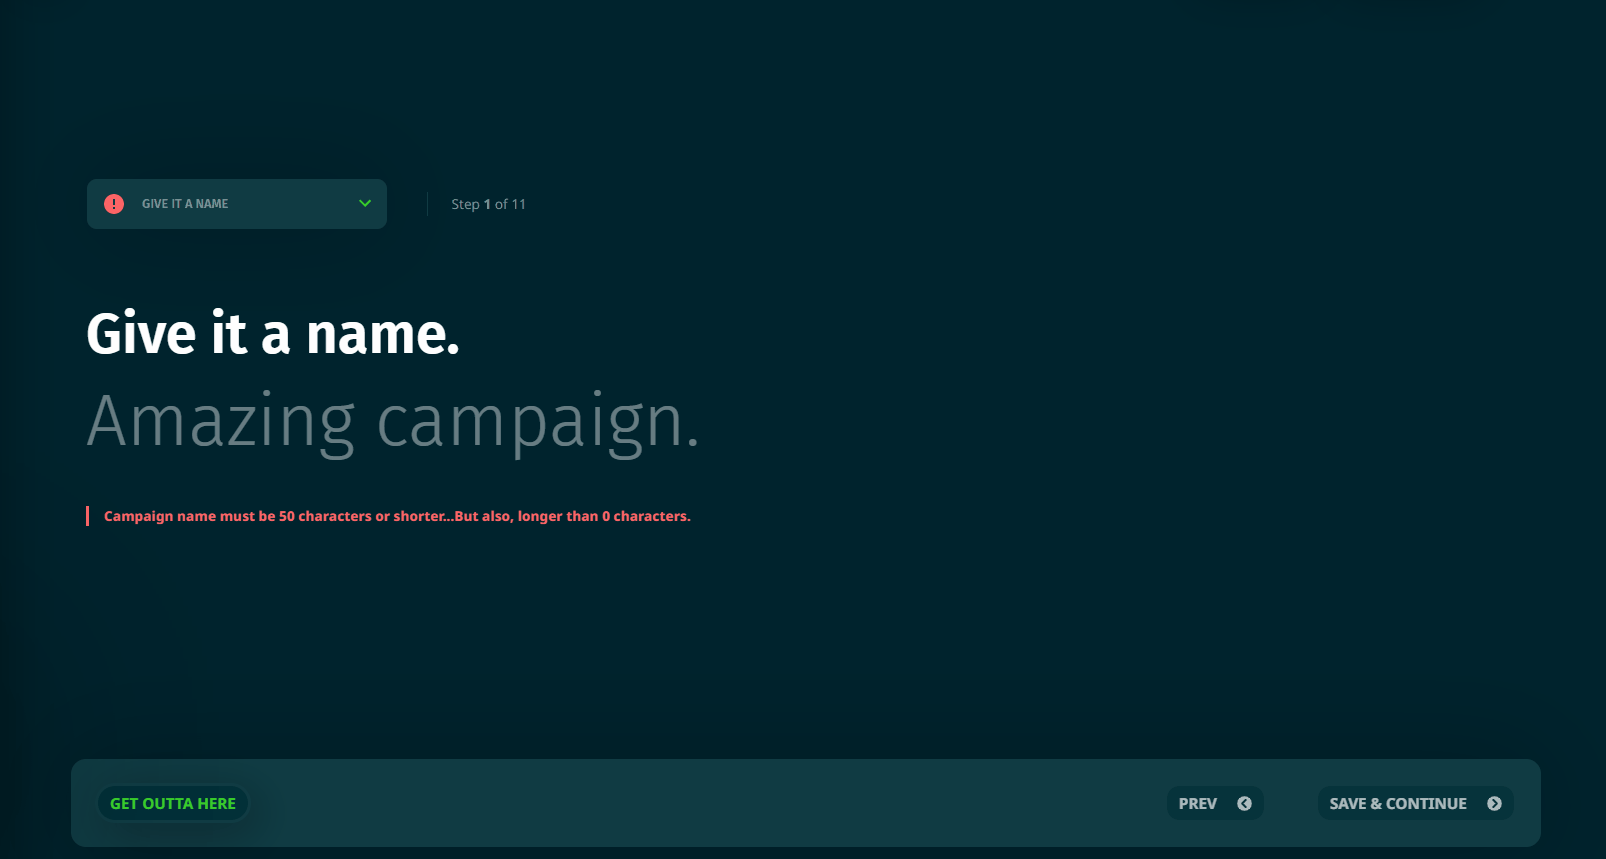
First things first, give your campaign a name!

Hint: try to use a relevant naming convention (e.g. message, dates, formats = “spot sale” June 22, bus shelters) so that you can refer back to previous campaigns to improve performance or clone them for quick set-up next time around.
If you are using the teams or clients features within your account, you’ll now need to allocate “ownership” of the campaign to the relevant team and/or client. If you’re not using them, you won’t see this section.
Hint: If you’re using these features, it’s best practice to create any required teams/clients prior to setting up the campaign/s.
Dates & Schedule
Choose when you want your campaign to run - select a start and end date. You’ll be able to adjust the end date at any time, and you can adjust the start date right up until the first ad is delivered.
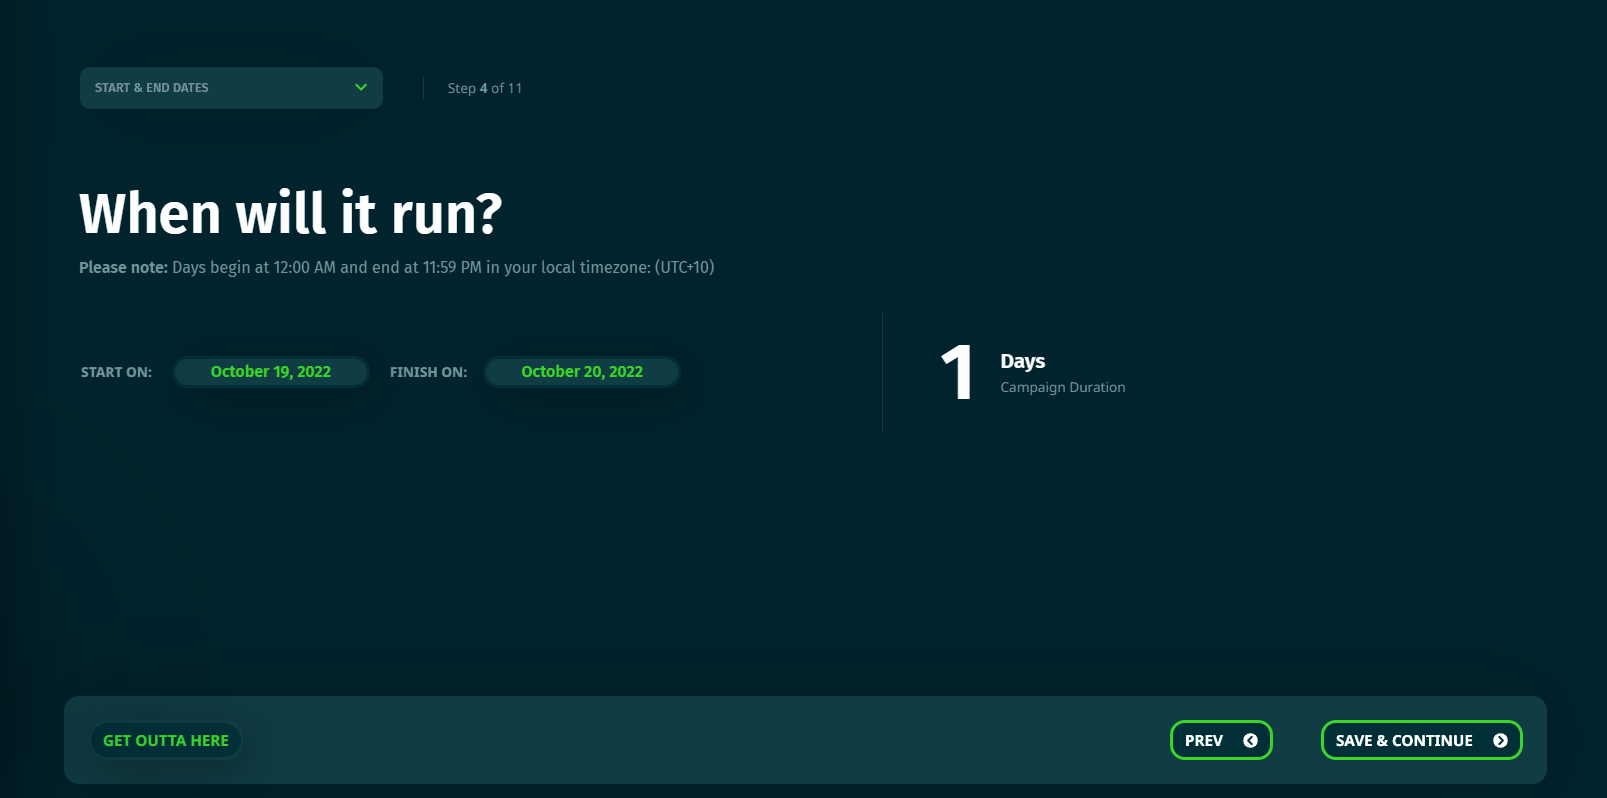
There are no rules here, you can go for as short as one day, or as long as one year.
Hint: Short, high value campaigns work well for announcements and limited promotions, while long or monthly on-going campaigns are usually better for recognition and being top of mind.
Now you can choose what times you want your campaign to be active. You can choose between always leaving your campaign on, or setting a custom schedule.
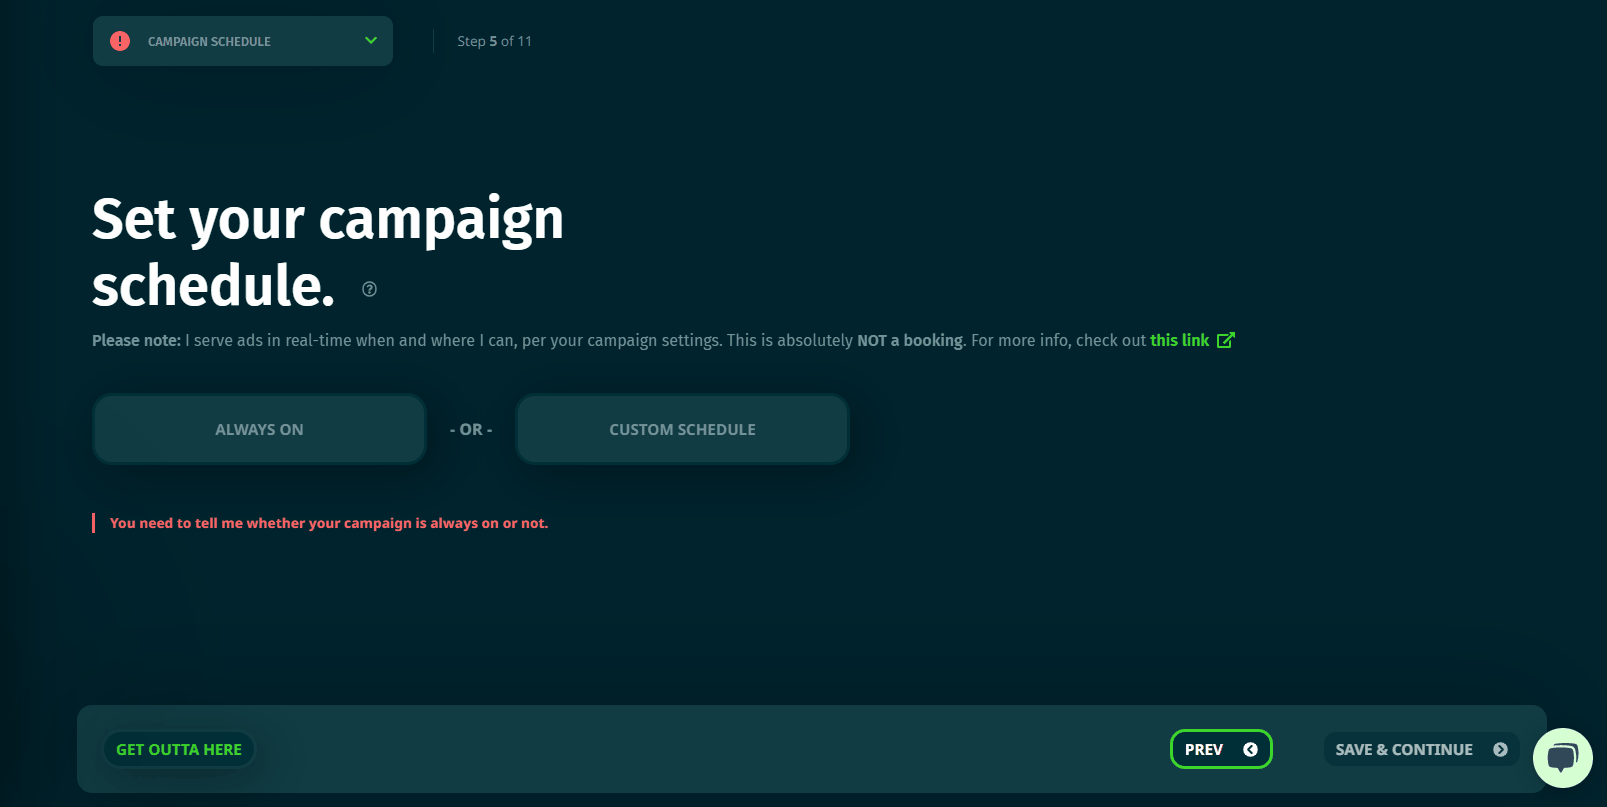
Think of the schedule like an on/off switch. The hours of day that you select, are the hours when your campaign will be on (we call these active hours). For any hours outside of the schedule, it’s off. There’s no guarantee of a set number of ad plays, or screen time within each active hour.
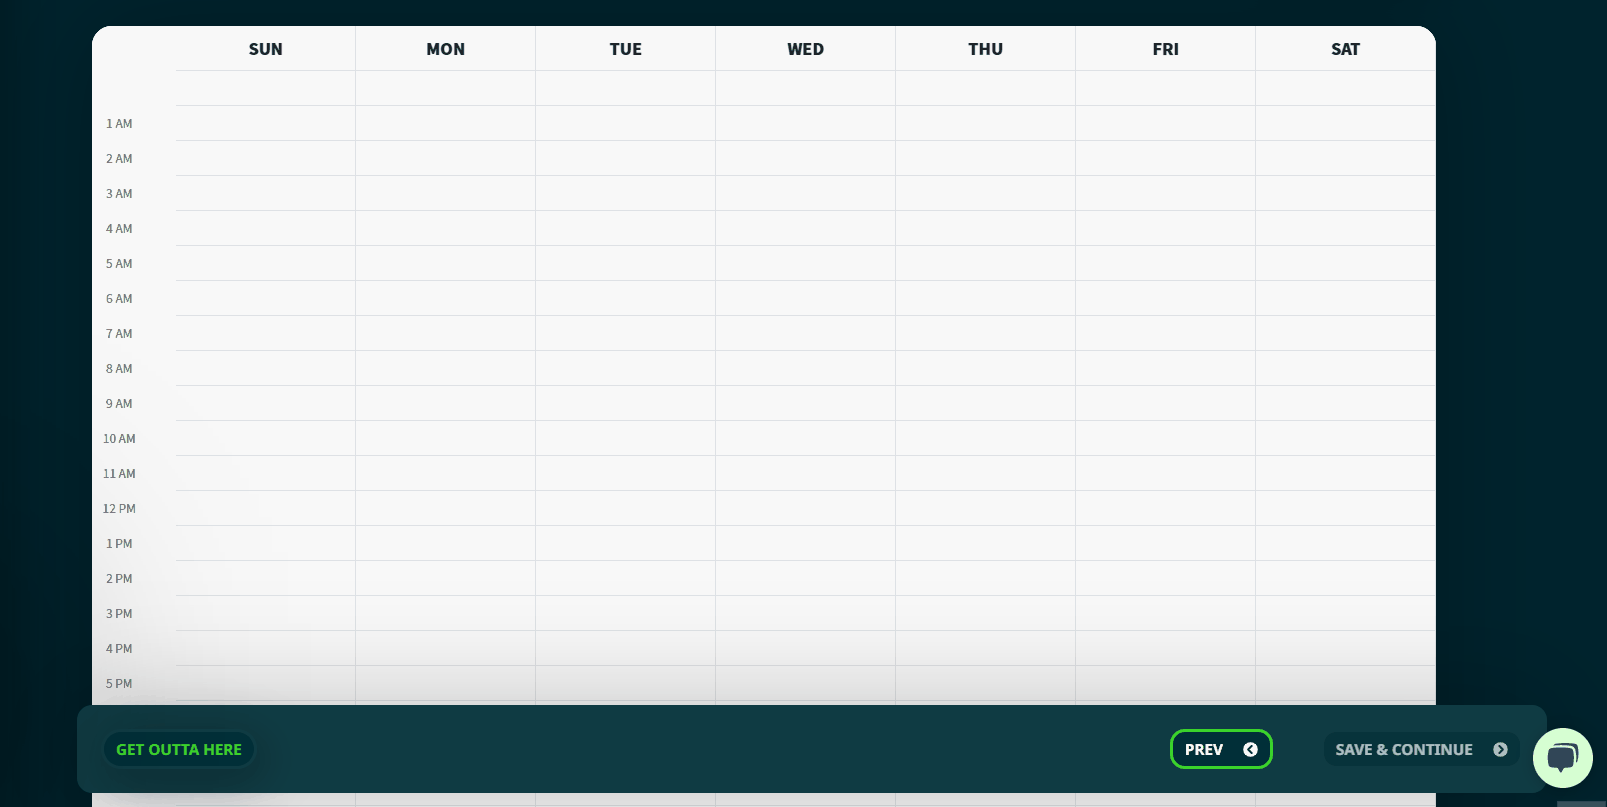
Hint: it’s usually recommended to set a custom schedule so that your ads are only playing (and using up budget) when your desired audience is around.
Boards & Targeting
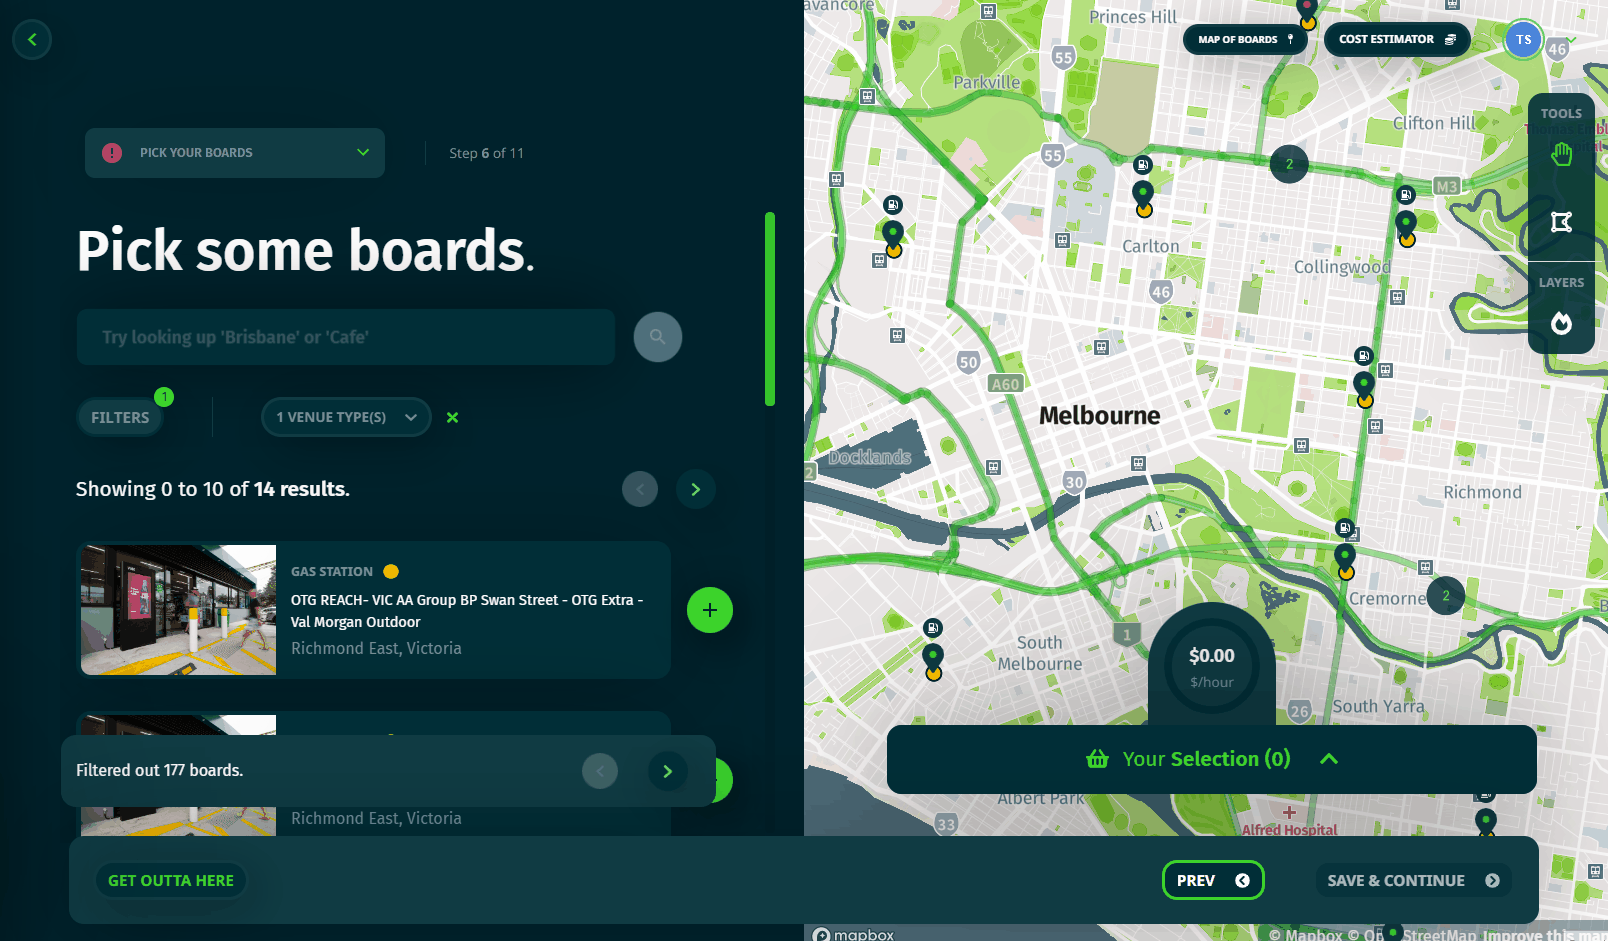
You’ll do most of your campaign set-up on the CAASie Map. This is where you select which boards/screens you want to include in your campaign.
You can pan and zoom around the map, or use the search bar to centre over an area of interest.

Each circle with a number inside represents a cluster of connected screens. As you zoom in to the map, they separate out. Pins show a single screen in that location (or in some cases a few screens that are synchronised to all play your ads at the same time).
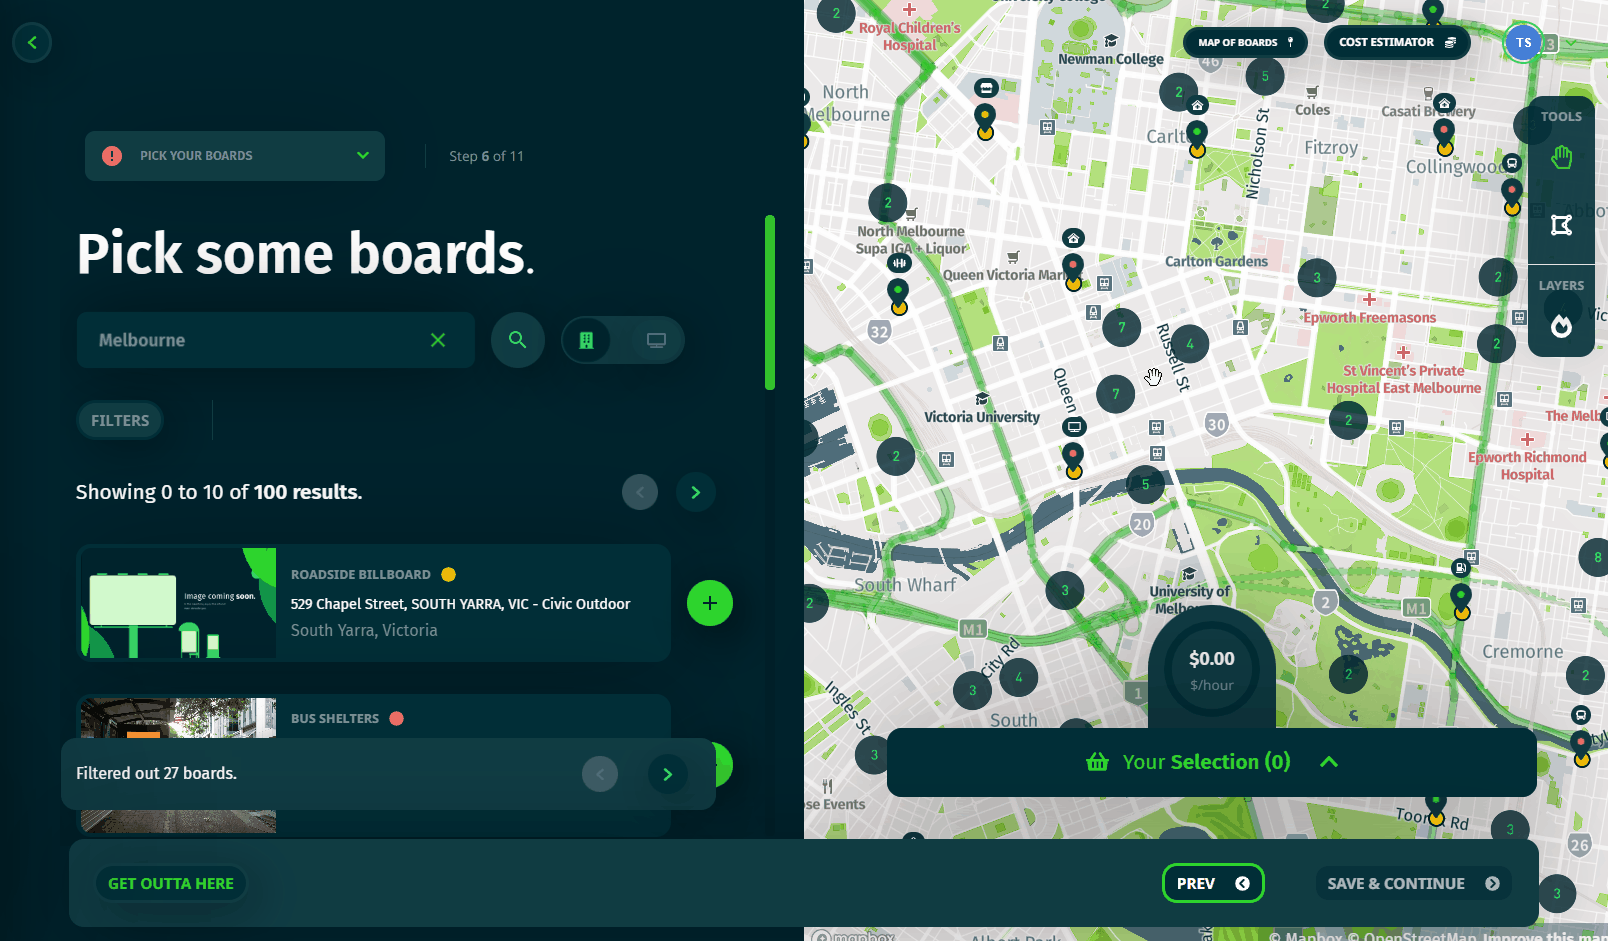
On the left hand panel, you’ll find all screens within the viewport (the area of the map that you can see) as a list.
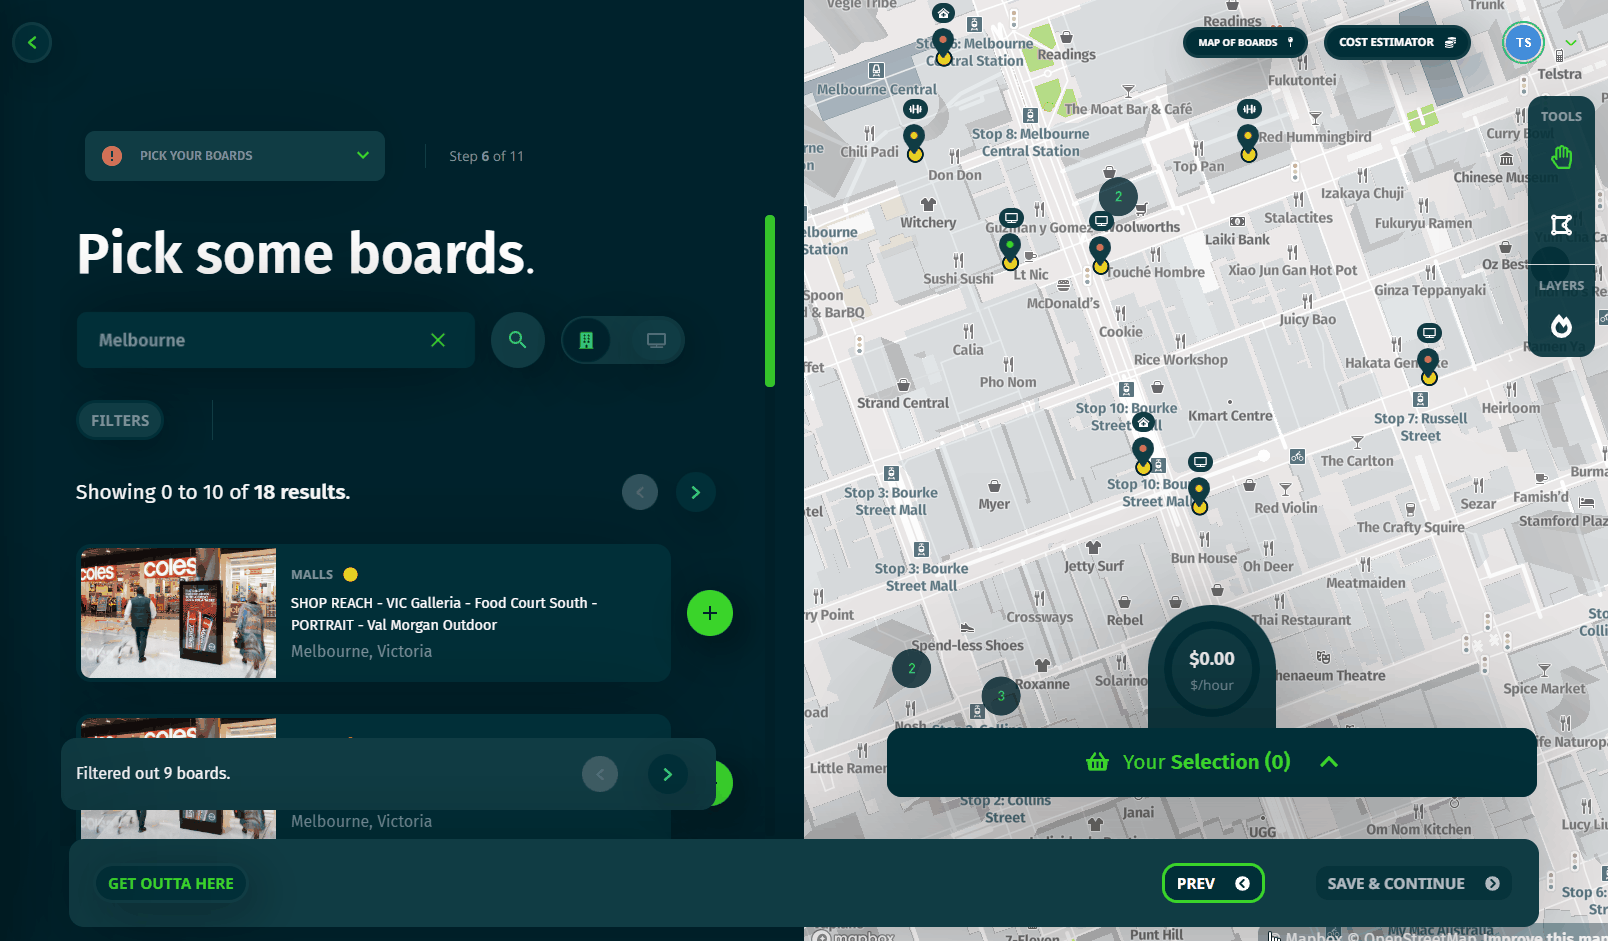
You can also use filters to narrow down which types of screens (e.g. gym, bus shelter, retail, etc) you want to display on the map and side panel.

You can hand select screens by clicking on the pins/numbers on the map and hitting the green plus button on the pop-up. Or you can hit the plus button on the screen in the list.
You can select a group of screens using the polygon tool (right hand tool bar on the map). Simply click to drop anchor points on the map and draw your own shape. Double click or close the shape to finish drawing. Everything under the shape that you draw will be selected for your campaign. You can draw as many shapes as you need to.
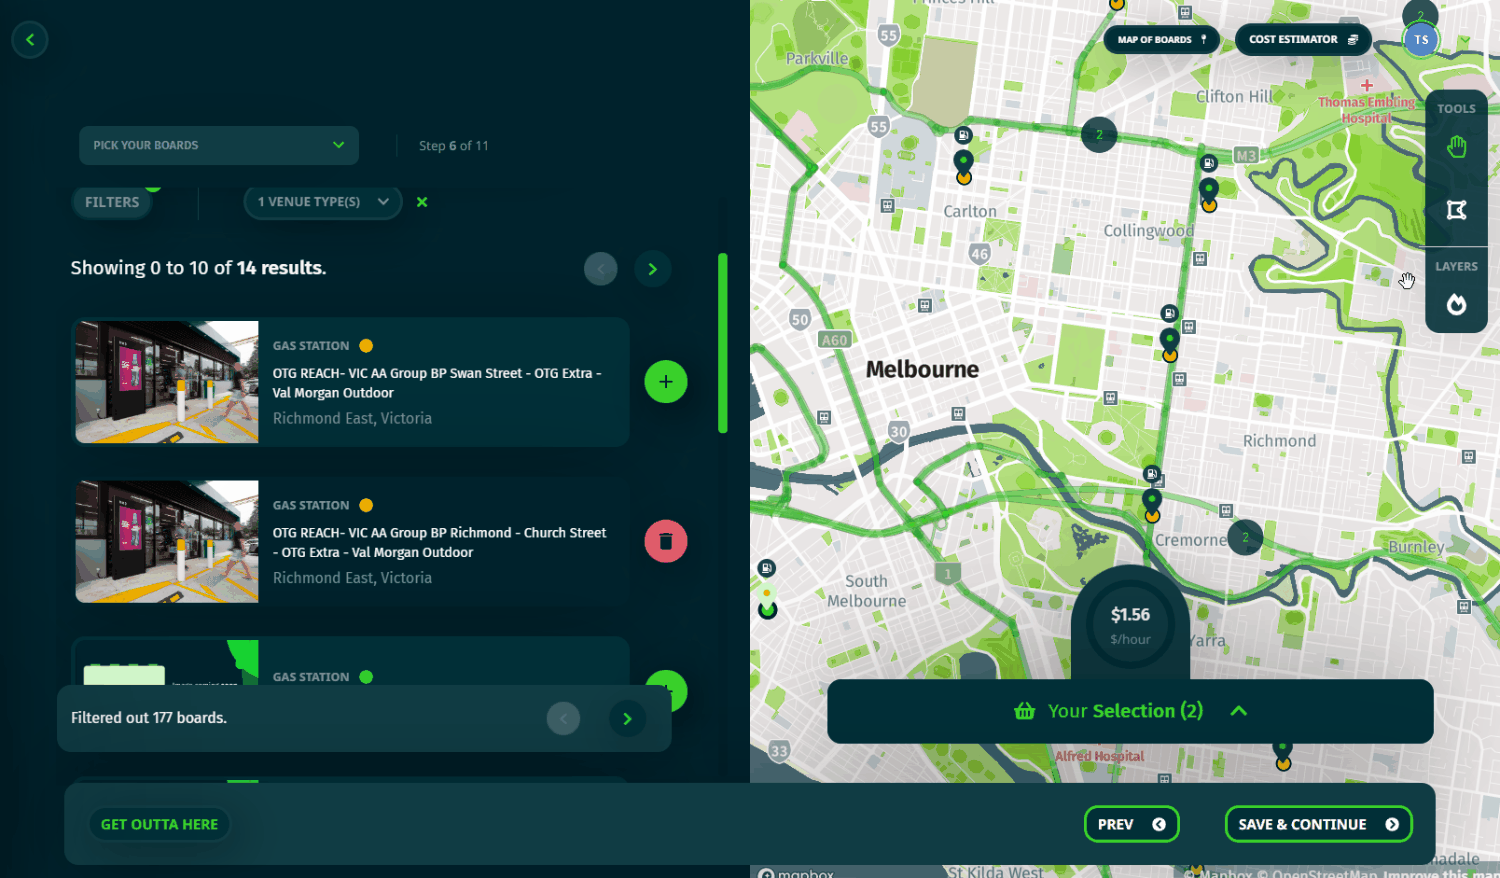
Once you have selected screens, they will drop into your cart, where you can still remove the ones that you don’t want.
Alongside your cart, you’ll see the “Hourly Budget Guide”, which gives you a rough estimate to how much you should expect to budget for all of the selected screens. This is only a guide to help you plan your campaigns, it is not necessarily how much you will spend.

Read more about boards, targeting & best practices here.
Hint: Promotions/campaigns may perform better if you separate each of your desired formats/venue types into different campaigns on CAASie. This way, you can set different active hours and budgets, relevant to the audiences that you want to reach. E.g. Before work might be most relevant to your audience in gyms, but the retail venues are not open/trading in the early hours of the morning.
Budget & Pacing
Budget
Your budget is a cap on how much credit you want to allocate to this specific campaign. There are two ways that you can determine your budget;
- Choose your own, because you know that’s how much you have allocated.
- Calculate how much you need based on the Hourly Budget Guide, or what you think is “close enough” to it.
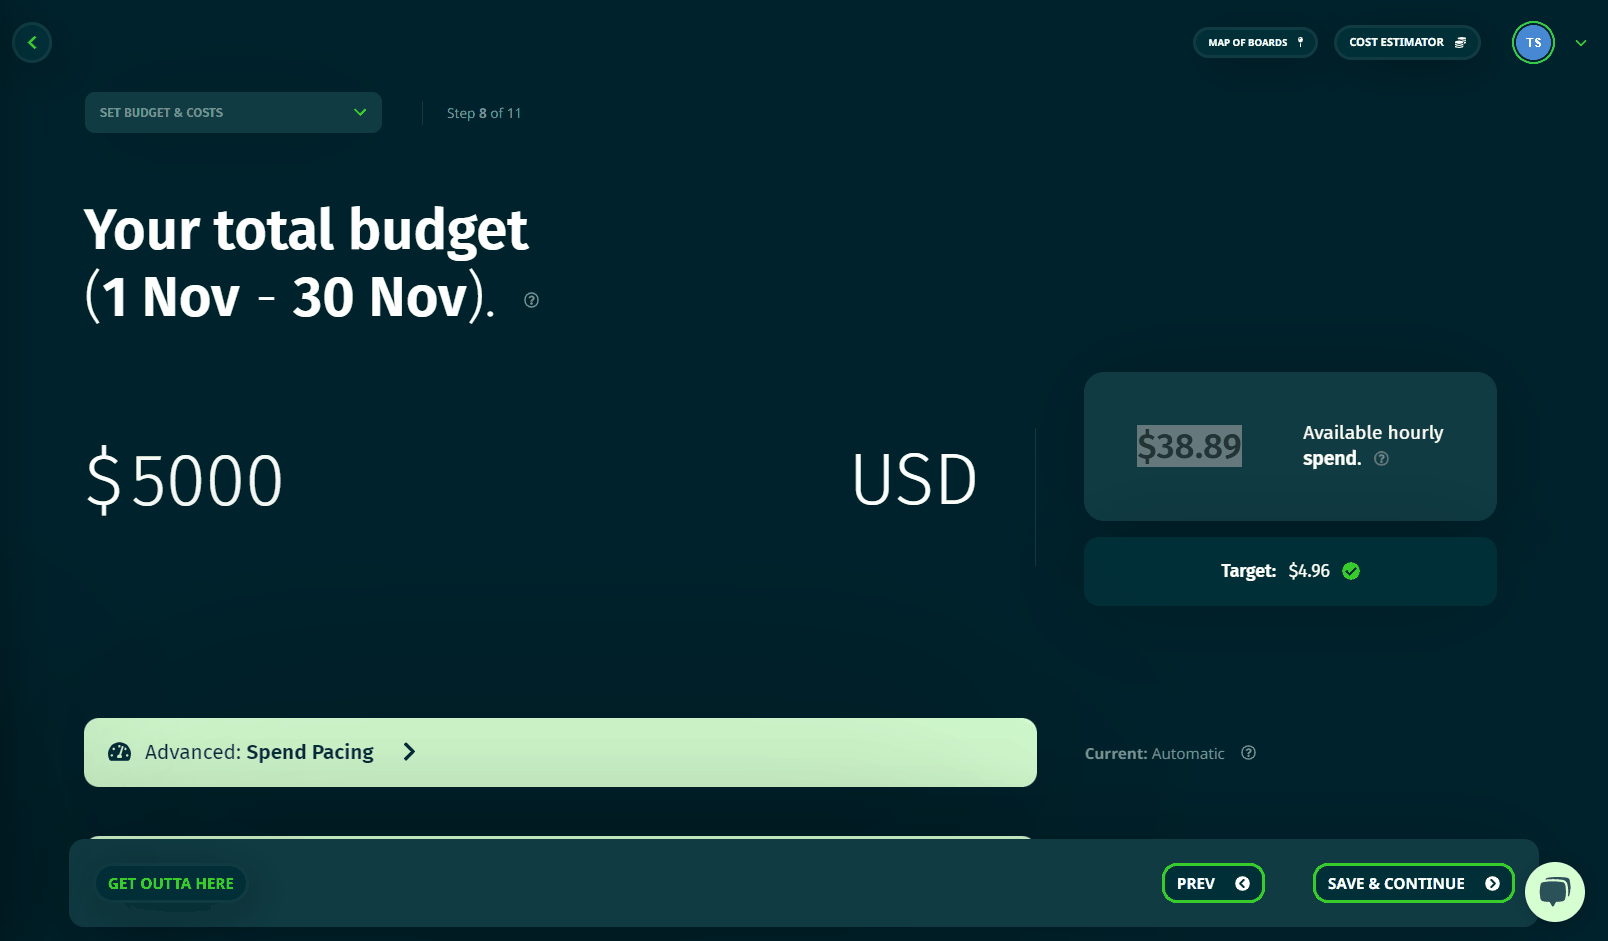
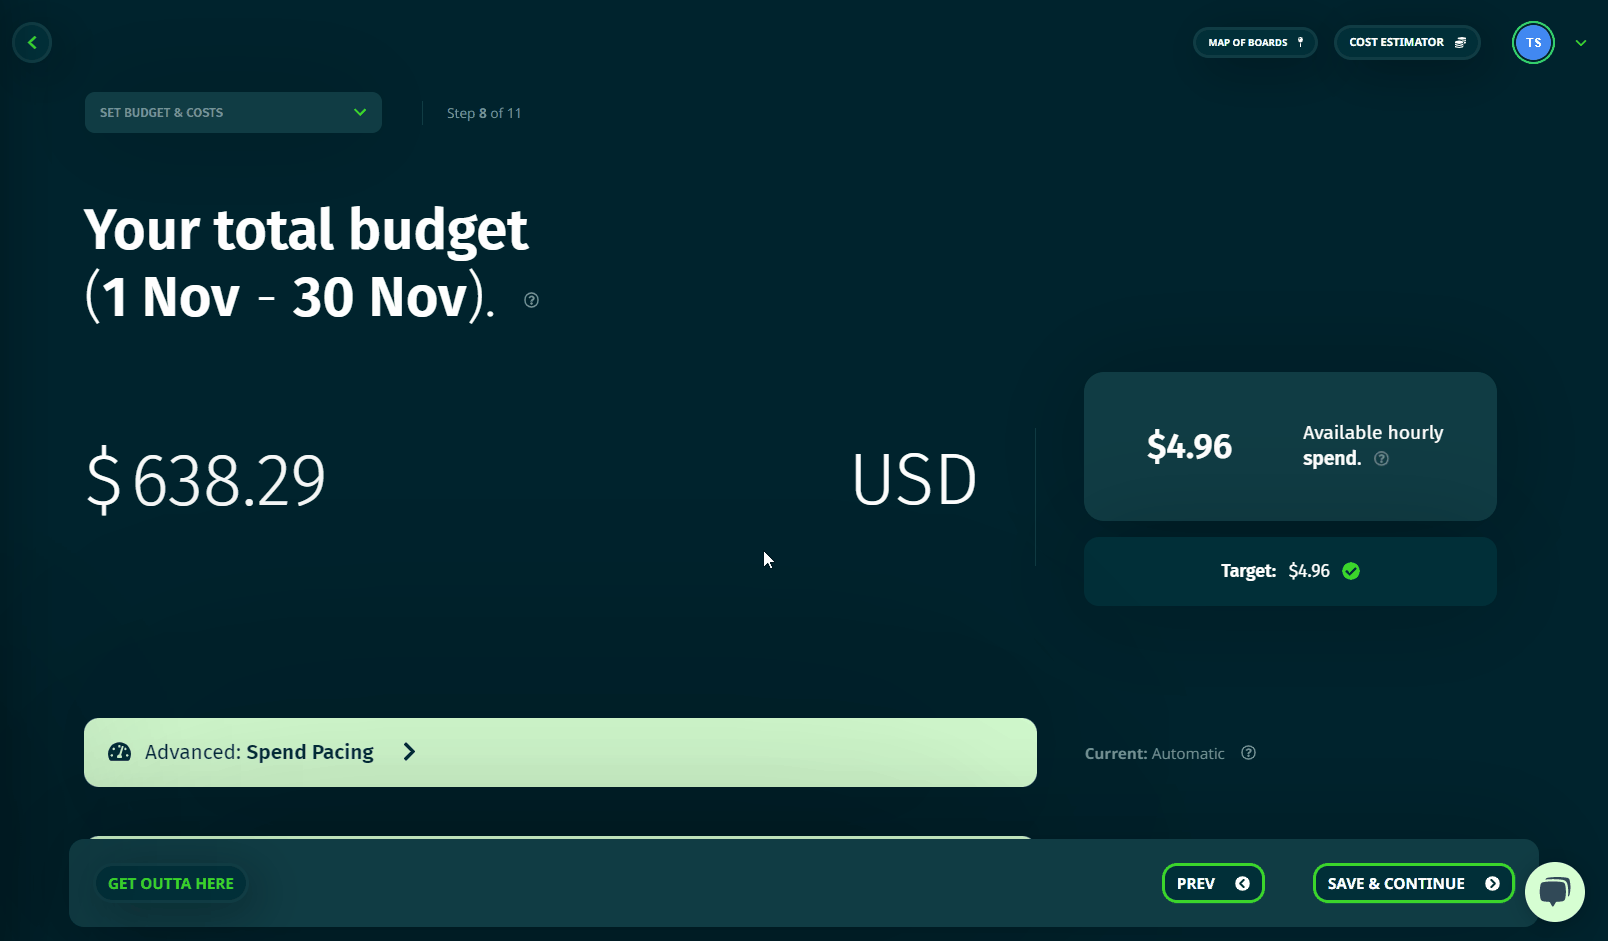
If you know that you have $5000 to spend, you can input this into the budget field. As you do this, you’ll see some numbers come up on the right hand side of the page.
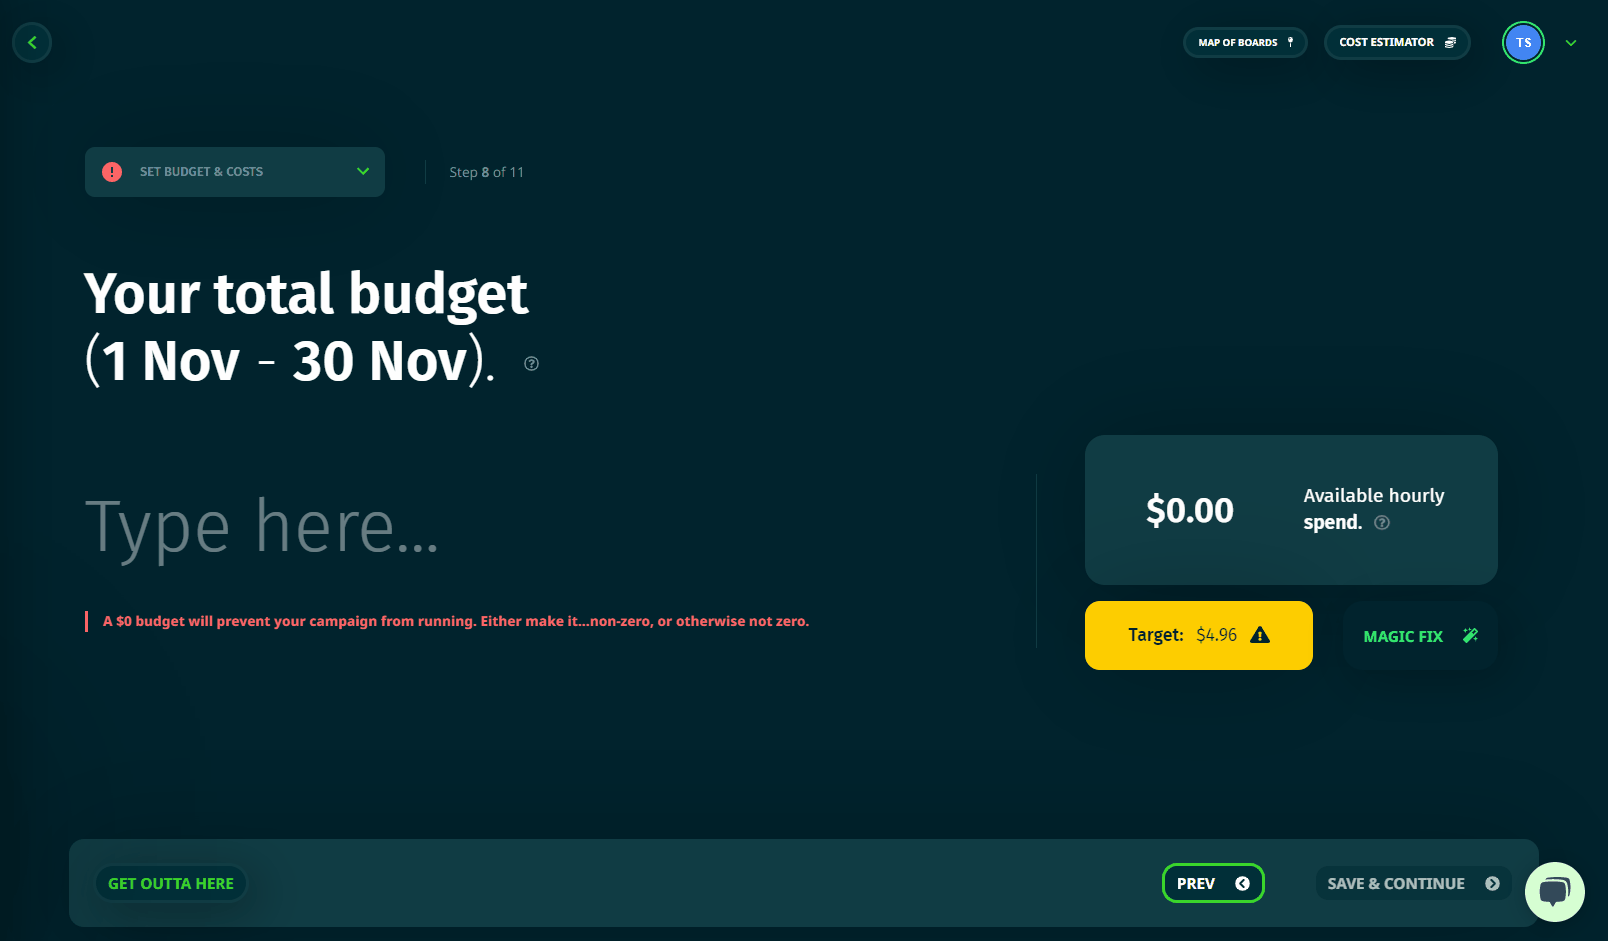
- The top figure - “Available hourly spend” - is your $5000 divided across all of the active hours within your campaign (based on dates and schedule). In other words, it’s an average rate of spend for the campaign.
- The lower figure - “target available hourly spend” - is the same number as in the hourly budget guide from the map. It’s only a guide, but you can use it to inform your budget.
- If your available hourly spend is lower than the target, you’ll also see a magic fix button to the right of the target. If you click this, it will auto-calculate a budget for you based on that guide.
Using this information, you can decide whether or not a $5000 budget is suitable for the campaign you’ve built so far, and adjust budget, schedule or dates as needed.
Read more about budget and pacing here.
Hint: If your available hourly spend is below the target spend, it means a lower frequency of ad plays than is “ideal” for those screens. High frequency is usually more important for shorter duration campaigns (up to 2 months). Long-term or monthly ongoing campaigns tend to be more flexible, since there’s extended opportunity for repeat exposure.
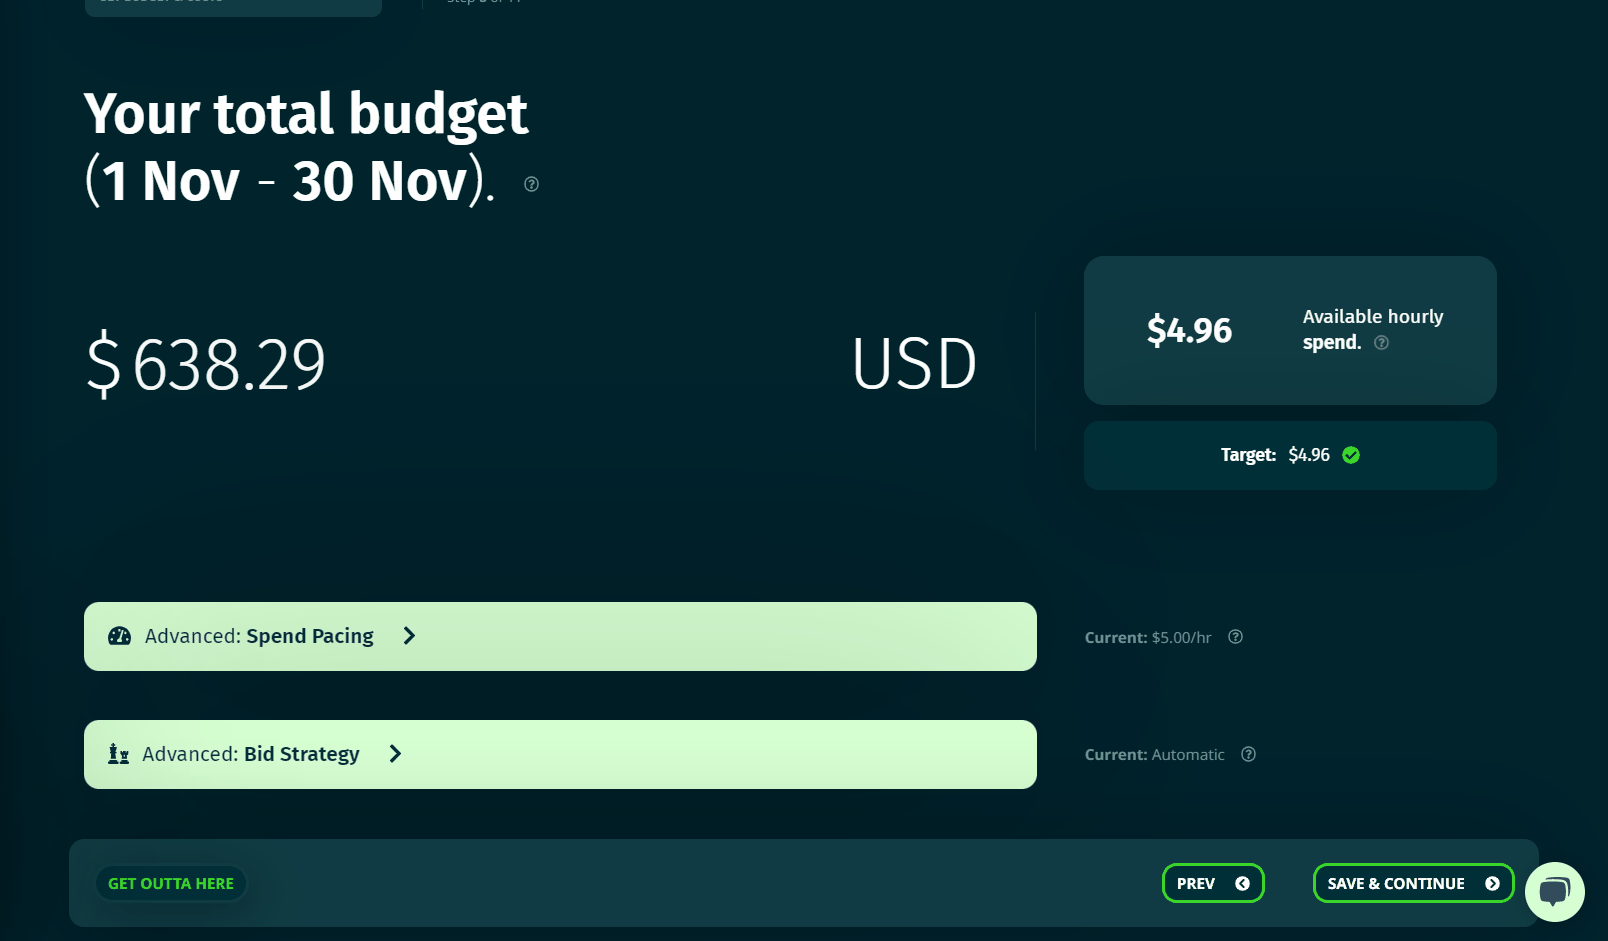
Pacing & bid strategy
Alongside your budget, you can fine tune the way that your campaign spends using custom pacing and/or bid strategies.
This is an advanced feature, so campaigns default to automatic settings. However you can choose to override them. You can even change them throughout the campaign duration.
Pacing refers to the rate of spend - i.e. how much credit you want to spend over a period of time.
- Auto-pacing uses your start and end date, as well as the available hourly spend, to pace your campaign so that your budget will last the full duration of your campaign.
- Daily pacing lets you set a target value to spend up to over each 24 hour day that your campaign is active.
- Hourly pacing allows you to set a target value to spend up to within each hour that your campaign is active.
In general, the smaller the window of time, the more controlled and consistent your spend (and therefore no. of ad plays) is. The campaign can under and overshoot these targets, but custom pacing can be very effective for highly targeted campaigns.
Bid strategy refers to how much you want to spend on each ad play (i.e. each time your ad is shown on a screen).
- Auto-bidding allows your bid to be dynamic so that you win as many ad plays as possible, according to the budget you have remaining at each point in time.
- Setting a max CPP (cost-per-play) allows you to restrict or cap all bids that your campaign puts forward. In other words - set the highest price you’re willing to pay for each ad play.
Hint: if you’re new to CAASie, we recommend that you start with the automatic settings until you become familiar with how your campaign behaves. You can adjust these settings throughout the campaign to improve performance if required.
Upload your ads
Different formats and screens require different ad specifications, however CAASie will automatically send the correct sizes to the correct screens for you.
Once you’ve selected all your screens, all required specifications will be listed on cards for you to upload the relevant ad file. As long as you follow all these specifications, uploading your ads is as simple as drag and drop!
Read more about specifications here.
If you don’t have any ads ready to go, you can skip forward and add them later. But if they are at hand, you can;
- Use the bulk uploader for images (not video) and the appropriate images will automatically fill their cards, or;
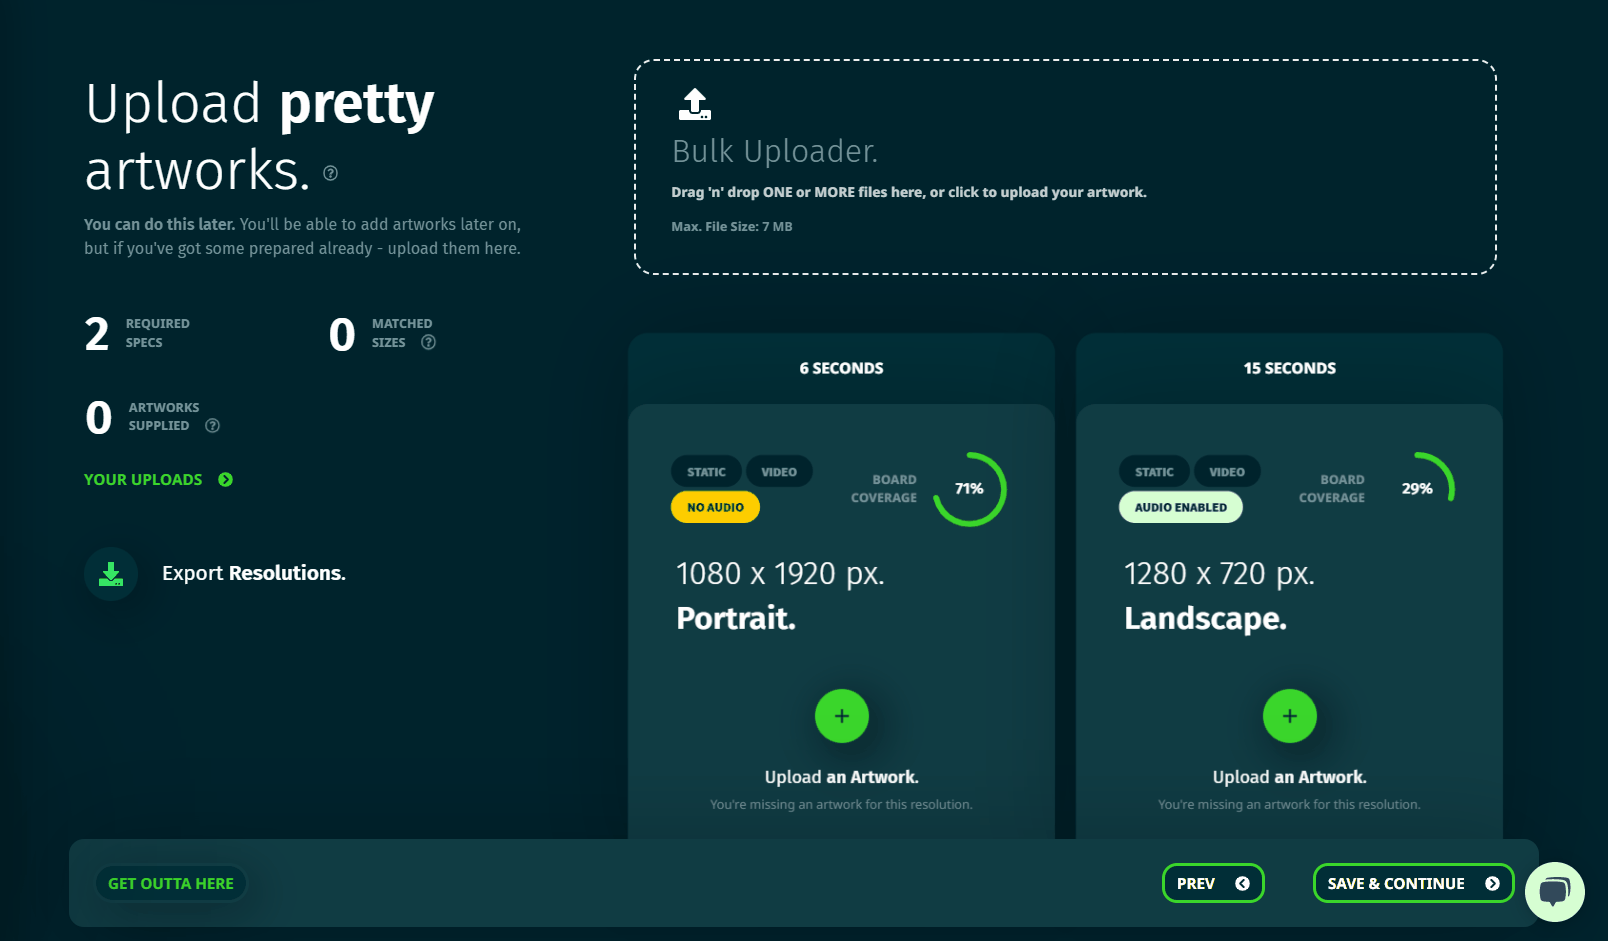
- Click into each card and load the files there. Each card tells you the required specs, and what percentage of your selected screens will be covered by that specification
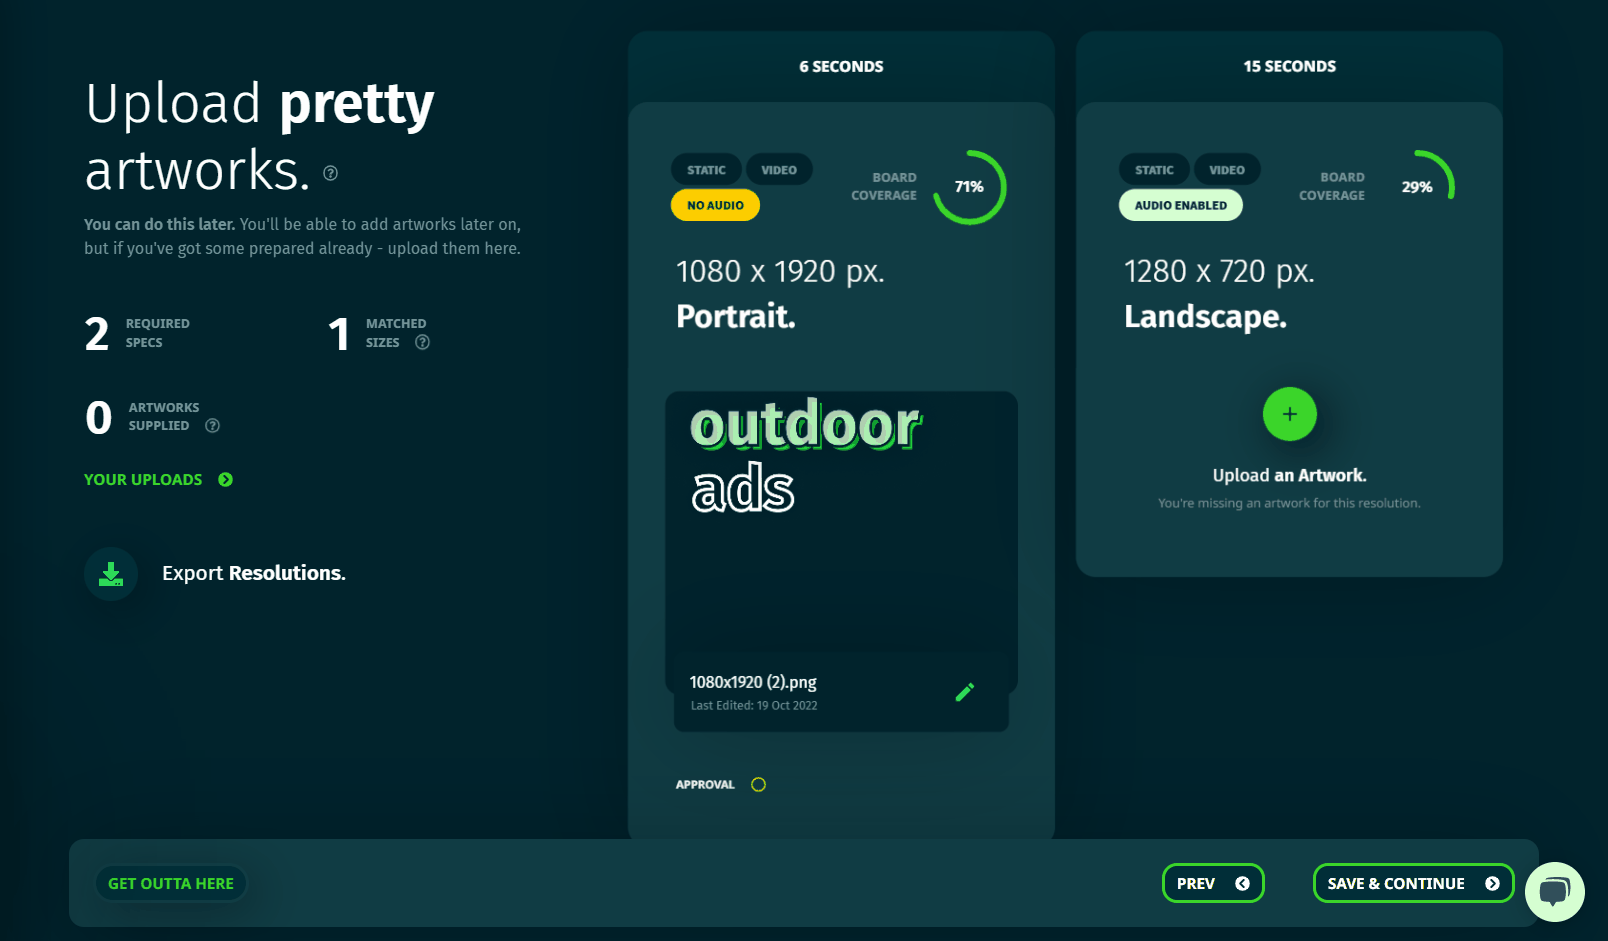
You don’t need to upload every variant for your campaign to run, however if you do miss one it can completely exclude a screen (or even venue type if they’re all the same spec), from receiving any ads.
Read more about ad management here.
Hint: The CAASie platform automatically rejects upload of ads that do not meet the specifications. If you don’t see your ad within the cards after attempting to upload them, it either didn’t save properly or wasn’t suitable. Keep your eyes open for error notices!
Track performance
Once you finish all the steps in the campaign wizard, you’ll drop into your new campaign’s dashboard. Here you can check the performance and tweak your campaign.
You’ll get real-time* feedback on how your campaign is progressing. You can monitor graphs of plays, spend, CPP, etc. You can then use this feedback to adjust any of your settings, swap out ads, add/remove screens and so on.
*There can be delays of a few hours for some components.
As a super speedy overview for basic campaigns;
Performance tab
- Overview graph - Check that the ads are playing consistently.
- Spend graph - Check how the budget is pacing, & use it to inform pacing changes if required.
- Cost-per-play graph - Check variation between Avg. and Max. CPP. If the avg. CPP is sitting on or very close to your Max. CPP, your campaign reach (impressions) may benefit by increasing the Max. CPP. But, sometimes there just isn’t much variation in CPP for some formats/venue types.
- Plays by board - check the spread of ads across different formats/screens. The last thing you want is for your entire budget to be spent on one screen!
Boards tab
- Check the availability of your boards, if there are a large number of them showing red - you might like to include different/additional screens. But keep in mind that they may be shown as unavailable because screens are off (e.g. it’s outside of business hours for the venue).
- Make sure that each board/screen has a supplied ad which is approved. If not, it can’t play.
Read more about analytics & attribution here.
Read more about best practices for campaign setup in our cheat sheet here.


