


The Basics
Your ads are the backbone of any campaign. This section walks you through the CAASie concepts of ‘ads’ and ‘artworks’ within your campaigns and gives you a walkthrough on the various ways you can upload your pretty pictures into the platform and have them show up on the big screen (or screens, as the case may be).
Ads vs. Artworks
The first thing to understand is the terminology that is in use on the CAASie platform. You’ll probably notice that in-platform, the words ‘Ads’ and ‘Artworks’ are often used together. And, as much as it looks like they’re used interchangeably, they’re not the same. Here’s the difference
- Artwork - A file that you want to display on a board. Usually takes the form of a static image (e.g. PNG) or video (e.g. MP4).
- Ad - A link between an Artwork and a Campaign. An ‘Ad’ is created when you upload (or use) an Artwork in a campaign. It lets the campaign know which artwork to serve to which board.
So, with that out of the way, we can get onto talking about how we can upload artworks, and use those artworks to create ads!
Creating and Managing Artworks
Creating an Artwork
Creating an artwork can be done in a number of places within the platform and . In fact, in most cases, you don’t explicitly ‘create’ an artwork - you’re simply uploading a picture or video into your campaign.
So, at any point when you’re uploading your files, be it during the creation of a new campaign, modification of an existing campaign, or uploading into your gallery (explained further below), you’re implicitly creating an artwork for future use.
Your (Artwork) Gallery
Your artwork gallery is accessed via the sidebar. Here, you’ll find every artwork you’ve uploaded to your organisation (or, if you’re an agency - to all your clients’ organisations).
There are two primary reasons to visit your gallery. The first is to upload new files (i.e. make new artworks), and the second is to check on the status of your file’s approval.
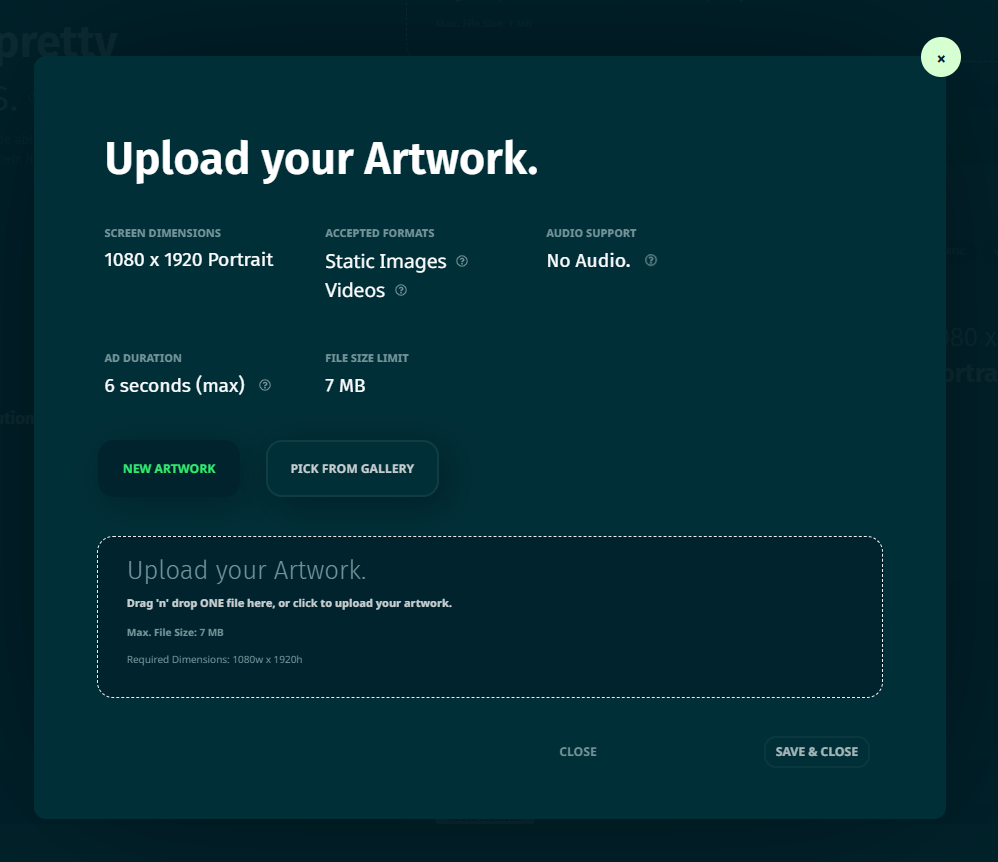
In the first case, head on to the top right of your window, and see the giant upload symbol. That will let you upload your artwork into the gallery. Just follow the on-screen instructions and you’ll be good to go.
.gif)
In case you’re looking to check on an artwork, you’ll want to find the artwork using your gallery’s search bar, and click into it.
In the popup that, well, pops up - you’ll see some basic information about the artwork you’ve created. If this artwork is in use (i.e. it’s in a campaign), you’ll see the artwork’s approval status. This will not be visible until the artwork is in use by at least one campaign. In other words, this artwork must have been used to create at least one ad since you uploaded it!
Creating & Managing Ads
Creating a new ad
When you’re creating a campaign, you’ll be prompted to create one or more ads matching the different specs of the boards you’ve chosen. The page you drop into looks like an array of cards with plus buttons that might be a little perplexing at first. However, it’s basically just a matter of associating an artwork with the campaign.
There are two ways to do this. You can either create an ad from an artwork you’ve uploaded before (e.g. reusing a previously-uploaded artwork), or you can upload a whole new artwork. In either case, this process creates an ‘ad’ entity with the uploaded artwork which will be used by the campaign. We’ll walk you through this process here.
Create a new ad from existing artwork
Creating an ad from an existing artwork simply involves navigating to the campaign (or new campaign wizard)’s ad creation section (screenshots shown below) and clicking into an individual card.
Once you click into the card, you’ll be presented with the default option (which is to create a new artwork by uploading), or to reuse an existing artwork you’ve already uploaded previously.
If you’re trying to pick a previously-uploaded artwork, then it is important to realise that CAASie will ONLY show you pixel-perfect matches to the specifications set by the card. This means that any other sizes (even if they match on an aspect-ratio basis) will not be shown here for choosing. You’ll have to re-upload those ads separately.
Once you’ve picked the artwork, you’ll be able to then hit save, and this will create an ad that binds the artwork you’ve chosen to the campaign.
Create a new ad from new artwork
To create an ad from a new artwork the process is roughly the same as described above, however, you have more options and flexibility. You can upload all the artworks in bulk by dragging and dropping into your campaign’s bulk uploader, during the new campaign wizard setup process (obviously, in the ads/artworks section).
Alternatively, you can click onto the single spec card to open the upload artwork prompt. Here, you’ll be asked to upload a file matching the specs required by the board(s) in your campaign.
The advantage of uploading an artwork this way is that you will (to some extent) get flexibility on sizing, at least for static artworks (e.g. PNG/JPG/etc.). Once you upload a file - if the file is too physically large (i.e. the pixel dimensions either side are larger than required) AND it can be cropped down to an appropriate size, you’ll get the option to crop the artwork to size.

This doesn’t apply for video artworks since we cannot crop them on the fly, but it gives you a bit of space to play around if you have static artworks that are almost (but not quite) the right size.
Removing existing ads
Ads can be added or removed from campaigns at any time, regardless of whether you’re in the new campaign wizard or editing an existing campaign. To remove an ad, just click onto the pencil (edit) symbol on the card that it’s on and click ‘remove file’ in the popup that appears. Here’s a quick demonstration of doing just that:
This process only removes the association of the artwork from the ad, and therefore from the campaign. It does NOT delete the artwork. You’ll still be able to use it in future campaigns if you so choose.
Handoff to Designers
You’ll probably notice quite quickly that CAASie is highly specific on the formats and resolutions of artworks you upload. In fact, most boards on CAASie require pixel-perfect dimensions. This can be problematic if you’re not personally designing the artworks yourself. Getting it right ends up being a game of Chinese Whispers when you’re coordinating with an external designer.
This is where CAASie can help you hand-off to the designers. What does this mean? Well, basically you can get a CSV file of all the unique specs you’ll need for your campaign that you can share with your designers. This helps make sure everybody is on the same page when it comes to creating a campaign.
Depending on the state of your campaign, there are two ways in which you can export the required specs for handoff to designers. If your campaign is still a draft, it can be exported from the artwork upload page. If your campaign has already been created, then it’ll need to be done from the Artworks tab. Here’s a quick walkthrough of both scenarios:
For a draft campaign:
And, for an existing campaign:

Just email these through to your designer and they should have pretty much everything they need to create an artwork! Though, if they want to create a smashing artwork, we would certainly recommend checking out the artwork best practice article here.
More Reading
Read about artwork best practices


